Showing posts with label iOS. Show all posts

Tuesday, January 3, 2017

Proceso de Unit Testing

Hablemos de Unit Testing. Este tema reaparece cada par de semanas en grupos de Android, por lo que parece interesante hablar de él.

Cuando se habla de Unit Testing existen varias opciones, como unit testing, integration testing, UI testing… todas son opciones válidas, pero en este post voy a hablar de qué es Unit Testing en general, y el por qué quieres tener unit testing en tu aplicación.

Voy a explicar esto con escenarios de experiencias que me han ocurrido en mi carrera.

Tu nueva aplicación - Dia 1.

Digamos que comienzas a hacer una aplicación nueva, y tu eres el único desarrollador en el proyecto. Esta aplicación es una aplicación bancaria, que solo te deja crear una cuenta nueva en el banco, y ver el saldo de tu cuenta.

La aplicación tiene una serie de requisitos, pero uno de esos es que cuando alguien cree una cuenta nueva, la aplicación revisa si la persona es mayor de 18 años. Si la persona tiene 18 años, o más, la cuenta puede ser creada. Si la persona tiene 17 años, o menos, la cuenta no puede ser creada. Super simple, pero es un requisito legal que es muy importante para tu empresa.

Como la aplicación es pequeña, y tu eres el único desarrollador, tú sabes de que en alguna parte de tu código, existe una cosa que revisa la edad. Digamos que la edad es verificada con algo así:

public boolean puedeCrearCuenta(Usuario usuario) {
if (usuario.edad < 17) {
return true;
}
return false;
}


La forma específica de cómo se revisa la edad es irrelevante. Lo que nos importa es que si pasamos un objeto de tipo Usuario, podemos ver si ese usuario puede crear una cuenta.

La aplicación es lanzada al público, y todo sale bien. Tu sabes que esa parte del código es importante, pero es una verificación tan pequeña que no es documentada ni probada.

Tu aplicación - 6 meses después

Tu aplicación está siendo utilizada por muchos usuarios, y el banco le quiere agregar muchas otras habilidades. Lamentablemente tu no puedes hacer todo, por lo que el banco contrata 2 desarrolladores más, o contrata con otra empresa para que ellos puedan crear las habilidades nuevas de la aplicación.

Tu verificacion de edad, que escribiste hace 6 meses, continúa en el código, pero como nunca fue documentada, y está escrita en una forma muy básica, los desarrolladores nuevos modifican el código.

Como los desarrolladores nuevos ven el nombre de “puedeCrearCuenta” piensan de que esta verificación puede tener muchas opciones...por lo que ellos le agregan mas cosas.

public boolean puedeCrearCuenta(Usuario usuario) {
if (usuario.edad < 17 && usuario.sueldo > 100000) {
return true;
}
return false;
}


Ahora tu verificacion de edad no solo revisa la edad, sino que también revisa el sueldo.

La aplicación compila, y nadie se da cuenta de la diferencia...hasta que tienes usuarios quejándose.

Unit Test al rescate

Si hubiéramos usado unit test, tal vez hubiéramos creado una par de pruebas como éstas:

public void testCrearCuentaAdulto() {
Usuario usuario = new Usuario();
usuario.nombre = "Eduardo Flores";
usuario.edad = 18;
assertTrue(puedeCrearCuenta(usuario));
}


public void testCrearCuentaMenorDeEdad() {
Usuario usuario = new Usuario();
usuario.nombre = "Eduardo Flores";
usuario.edad = 17;
assertFalse(puedeCrearCuenta(usuario));
}


Estas 2 pruebas son super simples. Lo único que estamos haciendo es crear un nuevo objeto de tipo Usuario, le damos un nombre al usuario y le damos una edad.

La primera prueba válida a el usuario de 18 años, y por lo tanto puede crear una cuenta. La segunda prueba revisa de que un usuario de 17 años no pueda crear una cuenta.

Ambas pruebas deberían pasar, sin importar el sueldo.

Qué logramos con nuestro Unit Test?

Es entendible de que en este momento tu digas “es obvio de que ambas pruebas van a pasar. Yo escribí el código, y yo escribí las pruebas. Y ambas pruebas son extremadamente simples!”
Y tendrías toda la razón, y es muy bueno que pase las pruebas.

La verdad es que Unit Testing no tiene nada de magia ni nada específico de código que nos importe. Comúnmente las pruebas de Unit Test son así de simples: creas un objeto, y pruebas un elemento específico de tu código.

En donde Unit Test es increíblemente poderoso es en el proceso de cómo desarrollamos la aplicación.

Es decir, Unit Testing es 90% proceso y 10% código...y el que escribas es comúnmente irrelevante.

Si tu aplicación hubiera tenido unit tests, como las 2 propuestas en este post, cuando los desarrolladores nuevos modifiquen el código del método puedeCrearCuenta(), una de las 2 pruebas va a fallar porque no estamos pasando un sueldo. Esto hubiera sido una prueba muy simple y rápida para ver que el código agregado a puedeCrearCuenta() no deberia ir ahi, o simplemente no funciona.

Como crear el proceso

Depende de tu empresa, existen 2 formas en cómo verificar tu código con tus pruebas de unit test:
  1. Puedes hacer correr tu código de unit test arbitrariamente. Un ejemplo de esto es hacer correr las pruebas de unit test cada cierta cantidad de días, o antes de lanzar una actualización (o aplicación nueva)
  2. Puedes usar una aplicación a nivel de creación de tu build para correr tus pruebas de unit test. Nosotros usamos Jenkins, y cada vez que alguien escribe código nuevo a el repositorio, jenkins corre la aplicación y las pruebas de unit test. Si alguna prueba falla, le manda un email a todo el equipo.
El único cuasi-requisito de unit test es de que prueben 1 sola cosa específica. No te sirve de nada si la prueba de unit test revisa la edad, un nombre valido, una dirección correcta, etc… ya que si la prueba falla, el reporte enviado a todos es muy vago.

Conclusion

Espero de que este post te sirva para entender de que Unit Test no es requerido, pero es parte de un proceso que te puede ayudar a eliminar errores lógicos.
Unit testing tambien sirve mucho para verificar de que las cosas que funcionaron hace un año sigan funcionando hoy.

Te entendería de que pensaras de que puedes evitar el uso de Unit Test si usas mejor nombre para tu código, o comentarios, o documentación, pero lamentablemente eso comúnmente no sirve a largo plazo. Piensa de que si tus comentarios son en español, y tu empresa contrata con una empresa Alemana o Rusa o Inglesa, los contratistas no van a entender nada de tu documentación.

Aun así, si tu documentación fuera válida, no dice nada de cómo implementar el método. Que pasaria si en vez de revisar un integer (17) revisaramos en contra de Date() o en milliseconds? Es posible de que cambiemos la implementación, y tengamos un error lógico de cual es el límite de edad con la nueva implementación.

Eduardo.

Monday, June 13, 2016

Parsing complex JSON data in Swift 2!

This tutorial will show you how to parse a downloaded, somewhat complex, JSON object in Swift 2.2.

I have created 2 previous tutorials related to this, which get into more details on how to download and parse basic JSON data, and how to return it using completion handlers.
This tutorial is specifically to show you how to parse complex data, and traverse a JSON object tree.
This tutorial assumes you already know how to get the data downloaded, and understand how JSON parsing works.

Project setup

Since this project is all about parsing, I will not be making a UI or any other changes to a basic application.
This application starts from a brand new "Single view application" template of Xcode.

All the code created here will be used in the viewDidAppear() function of the default ViewController.swift class.

Sample JSON data

This tutorial will be using a JSON data I copied from an adobe JSON tutorial, and placed it on a new file so it is easier to download.

This is the url we'll be using: https://api.myjson.com/bins/x4l8
In case the url is down by the time you read this tutorial, here's the content of the entire file/url:
{

    "id": "0001",
    "type": "donut",
    "name": "Cake",
    "ppu": 0.55,
    "batters": {
        "batter": [
            {
                "id": "1001",
                "type": "Regular"
            },
            {
                "id": "1002",
                "type": "Chocolate"
            },
            {
                "id": "1003",
                "type": "Blueberry"
            },
            {
                "id": "1004",
                "type": "Devil's Food"
            }
        ]
    },
    "topping": [
        {
            "id": "5001",
            "type": "None"
        },
        {
            "id": "5002",
            "type": "Glazed"
        },
        {
            "id": "5005",
            "type": "Sugar"
        },
        {
            "id": "5007",
            "type": "Powdered Sugar"
        },
        {
            "id": "5006",
            "type": "Chocolate with Sprinkles"
        },
        {
            "id": "5003",
            "type": "Chocolate"
        },
        {
            "id": "5004",
            "type": "Maple"
        }
    ]

}

Download data

With all of the setup elements out of the way, we will turn to Xcode and start working on this.
Let's begin by downloading the data. Since this is the same code we used and explained in the first 2 tutorials, I will just copy the code block and assume you understand what I'm doing.
import UIKit
class ViewController: UIViewController {

    override func viewDidLoad() {
        super.viewDidLoad()
        
        // this is sample data I copied from Adobe.github.io
        // adobe.github.io/Spry/samples/data_region/JSONDataSetSample.html#Example2
        
        let jsonUrlAsString = "https://api.myjson.com/bins/x4l8"
        
        // make the GET call asynchrounously
        let configuration = NSURLSessionConfiguration.defaultSessionConfiguration();
        let headers: [NSObject : AnyObject] = ["Accept":"application/json"];
        configuration.HTTPAdditionalHeaders = headers;
        let session = NSURLSession(configuration: configuration)
        let dataTask = session.dataTaskWithURL(NSURL(string: jsonUrlAsString)!) { (data, response, error) in
            
            if(error == nil)
            {
            }
            else
            {
                print("Error downloading JSON data. Error = \(error)")
            }
        }
        dataTask.resume()
    }
}
And with the data downloaded, we need to begin our parsing process.
But first...

Understand JSON

Note: if you already understand what JSONs are, you may want to skip this section.
JSON strings are super easy. They are based on two concepts: JSON Objects and JSON Arrays, and key value pairs.

Key value pairs

These are 2 words that are separated with a colon (:), and each key value pair is separated with a comma (,). They are presented as this:

"key1":"value1", "key2":"value2","myKey":"my value","monster":"Cookie Monster", "myAge":32

Keys can have spaces, but they usually have issues on some programming languages, so that makes most keys to always be without spaces.
Values can be whatever you want. If they're Strings then they have quotes ("") around them, while integers and doubles don't have them. However, sometimes the output from the log from an IDE might place quotes around everything.

JSON Objects and JSON Arrays

By default a single JSON string contains a single JSON Object, but the most important part to remember about JSON Objects and JSON Arrays is this:

JSON Object are represented as {} (curly braces)
JSON Arrays are (usually) represented as [] (square brackets)

Note: XCode usually outputs JSON Arrays as () (parenthesis)

So with that, we can create a JSON Object like this:
{
 "key1": "value1",
 "monster": "Cookie Monster"
}
This is a JSON Object with 2 key values (we call that fields now)
Before we talk about JSON Arrays, you need to see what we can do now: we can do a key value pair with a key a JSON Object, like this:
{
 "key1": "value1",
 "monster": "Cookie Monster",
 "carObject": {
  "brand": "Ford",
  "model": "Model A"
 },
 "computerObject": {
  "brand": "Apple",
  "model": "Macbook pro"
 }
}
In here, we not have a key of carObject with a value of a new JSON Object. This new JSON Object has it's own set of key values. Same thing with computerObject.

JSON Arrays are basically what you would expect them to be: an array of JSON Objects. The only thing to remember is that JSON Arrays wrap JSON Objects, so they are represented before a curly brace.
Here's an example of a JSON Object with a JSON Array:
{
 "key1": "value1",
 "monster": "Cookie Monster",
 "carObject": [{
  "brand": "Ford",
  "model": "Model A"
 }, {
  "brand": "Chevy",
  "model": "Camaro"
 }]
}
So now inside the key of carObject we now have a JSON Array of JSON Objects. In this case we have 2 JSON Objects, each of them with their own key value pairs.

Actual Parsing process

Just like in the previous tutorials, we first need to convert our downloaded data into a JSON object, and we will do this using NSJSONSerialization.JSONObjectWithData function from the Foundation framework.
Then, instead copying one line at the time, I'm gonna copy the whole thing I did, and tell you later what it means.
Here's my entire class code:
import UIKit
class ViewController: UIViewController {

    override func viewDidLoad() {
        super.viewDidLoad()
        
        // this is sample data I copied from Adobe.github.io
        // adobe.github.io/Spry/samples/data_region/JSONDataSetSample.html#Example2
        
        let jsonUrlAsString = "https://api.myjson.com/bins/x4l8"
        
        // 1. make the GET call asynchrounously
        let configuration = NSURLSessionConfiguration.defaultSessionConfiguration();
        let headers: [NSObject : AnyObject] = ["Accept":"application/json"];
        configuration.HTTPAdditionalHeaders = headers;
        let session = NSURLSession(configuration: configuration)
        let dataTask = session.dataTaskWithURL(NSURL(string: jsonUrlAsString)!) { (data, response, error) in
            
            if(error == nil)
            {
                do
                {
                    // 2. convert downloaded NSData into JSONObject
                    let entireJson = try NSJSONSerialization.JSONObjectWithData(data!, options: .AllowFragments);
                    print("entireJson = \(entireJson)")
                    
                    // 3. parse root elements
                    let rootId = entireJson["id"] as? String
                    let rootType = entireJson["type"] as? String
                    let rootName = entireJson["name"] as? String
                    let rootPpu = entireJson["ppu"] as? Double          // no idea what ppu is or means
                   
                    //output result to console
                    print("rootId = \(rootId!)")
                    print("rootType = \(rootType!)")
                    print("rootName = \(rootName!)")
                    print("rootPpu = \(rootPpu!)")
                    
                    /*
                     * Batters section of the JSON
                     */
                    // 4. parse the 'batters' element
                    let battersDictionary = entireJson["batters"] as? NSDictionary
                    print("battersDictionary = \(battersDictionary!)")
                    
                    // 5. parse 'batter' element, expect an array
                    let batterArray = battersDictionary!["batter"] as? [NSDictionary]
                    print("batterArray = \(batterArray!)")
                    
                    // 6. iterate the batter array of dictionaries
                    for eachBatter in batterArray!
                    {
                        print("eachBatter = \(eachBatter)")
                        let eachBatterId = eachBatter["id"] as? String
                        let eachBatterType = eachBatter["type"] as? String
                        
                        //output result to console
                        print("eachBatterId = \(eachBatterId!)")
                        print("eachBatterType = \(eachBatterType!)")
                    }

                    
                    /*
                     * Toppings section of the JSON
                     */
                    let toppingArray = entireJson["topping"] as? [NSDictionary]
                    print("toppingArray = \(toppingArray!)")
                    
                    // interate the topping array of dictionaries
                    for eachTopping in toppingArray!
                    {
                        print("eachTopping = \(eachTopping)")
                        let eachToppingId = eachTopping["id"] as? String
                        let eachToppingType = eachTopping["type"] as? String
                        
                        //output result to console
                        print("eachToppingId = \(eachToppingId!)")
                        print("eachToppingType = \(eachToppingType!)")
                    }
                    
                }
                catch
                {
                    print("Error serializing JSON data")
                }
            }
            else
            {
                print("Error downloading JSON data. Error = \(error)")
            }
        }
        dataTask.resume()
    }
}
So....lets go by the numbers in the comments.

1 and 2. We make the GET call, and convert the NSData to a JSON Object. I covered that section extensively in a previous tutorial, so I won't get into it here.

3. We parse the root elements. These are elements that are at the root level, and not inside another JSON Object or JSON Array. There are only 4 of them in the sample JSON:
{

    "id": "0001",
    "type": "donut",
    "name": "Cake",
    "ppu": 0.55,
    // other stuff
} 
Notice the format used is: ["key"] as? String.
We use the key that comes from the JSON, the as? keyword which will allow nil values, and String is what we're expecting to get.
In one of the elements, ppu, we use as? Double, because we expect a Double type.

4. We move to the batters section:
{

    "id": "0001",
    "type": "donut",
    "name": "Cake",
    "ppu": 0.55,
    "batters": {
        "batter": [
    // more later
}
The batters section is an dictionary (AKA as map, or key-value pair), and we're actually expecting then an NSDictionary, we use this format:
["key"] as? NSDictionary

5. Inside of batters, we have objects that are "batter":[ ]. Remember that the [ ] is an array, and since we're using JSON format, our elements inside the array will always be a key-value pair.
This means, we have an array of dictionaries. In Apple-lingo, we call it an NSArray of NSDictionaries.
So we use this format for it:
["key"] as? [NSDictionary]

Since we're the 'batters' dictionary already, we do it like this:
myNextLevelJSONDictionary["key"] as? [NSDictionary]
This covers only this portion of the JSON:
"batters": {
    "batter": [

Note. Since this is an array of NSDictionaries, we could've also used this key:
["key"] as? [String:AnyObject]
Both formats work, although NSDictionary is preferred!

6. The array of dictionaries gave us...well, an array, and because of that we can iterate through it to get each element inside the array, individually.
In here I just used a regular for-each (or fast enumeration) loop.
Then, inside the loop I can get the values of each 'batter':
"batter": [
    {
    "id": "1001",
    "type": "Regular"
    },
With this, like format, like before:
eachBatter["key"] as? String

Then you repeat the recipe (no pun intended), and do it for Toppings.

I hope that helps!
Eduardo.

Saturday, June 11, 2016

Completion handlers for NSURLSessionDataTask. Returning downloaded data on iOS

This tutorial picks up exactly where I left my previous iOS tutorial of "Downloading and parsing JSON data in Swift 2.2", so you may want to at least read over that one to see where we're starting from, and how we got here.

Refactor code

The very first step is refactoring our code, primarily to make more sense of how a real application would use completion handlers to pass downloaded data around.

We'll begin by creating a new Swift class called "Utilities.swift" which will inherit from NSObject:
import Foundation
class Utilities : NSObject
{
    
}
New file added, and the project structure

We will then create a new static function (didn't we use to call them method in obj-c?) called getJsonData, which will take 1 parameter, of type String, and returns Void.
The Utilities class should look like this now:
import Foundation
class Utilities : NSObject
{
    static func getJsonData(jsonUrlAsString:String) -> Void
    {
        
    }
}
We then go back to our ViewController class we were using on the first tutorial, and cut everything from the network configuration, to the resume() call. We will paste this inside of our getJsonData inside of our Utilities class.

The Utilities class should be complaining about the UILabels we set in the previous tutorial.
We will need the code for this UILabels later, but since its easy to create we will just delete it from Utilities.

At this point, our Utilities class should look like this:
import Foundation
class Utilities : NSObject
{
    static func getJsonData(jsonUrlAsString:String) -> Void
    {
        let configuration = NSURLSessionConfiguration.defaultSessionConfiguration()
        let headers: [NSObject : AnyObject] = ["Accept":"application/json", "Auth":"token"]
        configuration.HTTPAdditionalHeaders = headers
        let session = NSURLSession(configuration: configuration)
        
        let downloadTask = session.dataTaskWithURL(NSURL(string: jsonUrlAsString)!) { (dataReceived, response, error) in
            if (error == nil)
            {
                print("dataReceived = \(dataReceived)")
                do
                {
                    let dataDownloadedAsJson = try NSJSONSerialization.JSONObjectWithData(dataReceived!, options: .AllowFragments)
                    print("dataDownloadedAsJson = \(dataDownloadedAsJson)")
                    
                    let nameRead = dataDownloadedAsJson["name"] as? String
                    let countryRead = dataDownloadedAsJson["country"] as? String
                    let genderRead = dataDownloadedAsJson["gender"] as? String
                    let ageRead = dataDownloadedAsJson["age"] as? Int
                    
                    print("nameRead = \(nameRead!)")
                    print("countryRead = \(countryRead!)")
                    print("genderRead = \(genderRead!)")
                    print("ageRead = \(ageRead!)")
                }
                catch
                {
                    
                }
            }
            else
            {
                print("Error downloading data. Error = \(error)")
            }
        }
        
        // actually execute the task
        downloadTask.resume()
    }
}

On our ViewController we want to call the function getJsonData from the Utilities class, so we do this passing the url as a String.
At this point, the ViewController class should look like this:
import UIKit
class ViewController: UIViewController
{

    @IBOutlet weak var labelName: UILabel!
    @IBOutlet weak var labelAge: UILabel!
    @IBOutlet weak var labelGender: UILabel!
    @IBOutlet weak var labelCountry: UILabel!
    
    override func viewDidLoad() {
        super.viewDidLoad()
        
        let jsonUrlAsString = "https://api.myjson.com/bins/2c0aw"
        Utilities.getJsonData(jsonUrlAsString)        
    }
}
So now, if we were to run our application, we should not have any compiling errors, and we should see the output on the console displaying something like this:
dataReceived = Optional()
dataDownloadedAsJson = {
    age = 32;
    country = USA;
    gender = male;
    name = "Eduardo Flores";
}
nameRead = Eduardo Flores
countryRead = USA
genderRead = male
ageRead = 32
sdad

If the code transplant so far does the same thing as it does to me, then we're ready to move on.
Everything should work, except...well the app UI.
Before we fix that we need to create an object to return.

Create return Object
I could pass a 4 variables back, but that'll be horrible and not what you'll do on a regular basis. (you don't do that, right?)
So let's create a new swift class and let's call it "Person.swift"
In here, we'll create 4 variables: name, age, gender and country.
The whole object should look like this:
import Foundation
class Person: NSObject
{
    var name : String?
    var age : Int?
    var gender : String?
    var country : String?
}
Now that we have the object data, let's add the Person object to the getJsonData function from the Utilities class. Now the code inside getJsonData looks like this:
do
static func getJsonData(jsonUrlAsString:String) -> Void
{
    let person = Person()

    let configuration = NSURLSessionConfiguration.defaultSessionConfiguration()
    let headers: [NSObject : AnyObject] = ["Accept":"application/json", "Auth":"token"]
    configuration.HTTPAdditionalHeaders = headers
    let session = NSURLSession(configuration: configuration)
    
    let downloadTask = session.dataTaskWithURL(NSURL(string: jsonUrlAsString)!) { (dataReceived, response, error) in
        if (error == nil)
        {
            print("dataReceived = \(dataReceived)")
        do
        {
            let dataDownloadedAsJson = try NSJSONSerialization.JSONObjectWithData(dataReceived!, options: .AllowFragments)
            print("dataDownloadedAsJson = \(dataDownloadedAsJson)")
            
            let nameRead = dataDownloadedAsJson["name"] as? String
            let countryRead = dataDownloadedAsJson["country"] as? String
            let genderRead = dataDownloadedAsJson["gender"] as? String
            let ageRead = dataDownloadedAsJson["age"] as? Int
            
            print("nameRead = \(nameRead!)")
            print("countryRead = \(countryRead!)")
            print("genderRead = \(genderRead!)")
            print("ageRead = \(ageRead!)")
            
            person.name = nameRead!
            person.age = ageRead!
            person.gender = genderRead!
            person.country = countryRead!
        }
        catch
        {
            
        }
        }
        else
        {
            print("Error downloading data. Error = \(error)")
        }
    }
    
    // actually execute the task
    downloadTask.resume()
}
And now we need to return the Person object.
This is not as simple as you expect...

Return data as return type

The issue we have is that we have data in one class, but we want to use it on another class. This is a fairly common affair in programming, and the initial approach would be to return Person instead of Void from the getJsonData function.

So let's try it!

In Utilities, change getJsonData the function to this:
static func getJsonData(jsonUrlAsString:String) -> Person
{
    let person = Person()

    let configuration = NSURLSessionConfiguration.defaultSessionConfiguration()
    let headers: [NSObject : AnyObject] = ["Accept":"application/json", "Auth":"token"]
    configuration.HTTPAdditionalHeaders = headers
    let session = NSURLSession(configuration: configuration)
    
    let downloadTask = session.dataTaskWithURL(NSURL(string: jsonUrlAsString)!) { (dataReceived, response, error) in
        if (error == nil)
        {
            print("dataReceived = \(dataReceived)")
        do
        {
            let dataDownloadedAsJson = try NSJSONSerialization.JSONObjectWithData(dataReceived!, options: .AllowFragments)
            print("dataDownloadedAsJson = \(dataDownloadedAsJson)")
            
            let nameRead = dataDownloadedAsJson["name"] as? String
            let countryRead = dataDownloadedAsJson["country"] as? String
            let genderRead = dataDownloadedAsJson["gender"] as? String
            let ageRead = dataDownloadedAsJson["age"] as? Int
            
            print("nameRead = \(nameRead!)")
            print("countryRead = \(countryRead!)")
            print("genderRead = \(genderRead!)")
            print("ageRead = \(ageRead!)")
            
            person.name = nameRead!
            person.age = ageRead!
            person.gender = genderRead!
            person.country = countryRead!
        }
        catch
        {
            
        }
        }
        else
        {
            print("Error downloading data. Error = \(error)")
        }
    }
    
    // actually execute the task
    downloadTask.resume()
    return person
}
and in the ViewController, change the way you call the getJsonData function, to this (and applying the result to the UI):
override func viewDidLoad() {
    super.viewDidLoad()
    
    let jsonUrlAsString = "https://api.myjson.com/bins/2c0aw"
    let person = Utilities.getJsonData(jsonUrlAsString)
    
    print("person.name = \(person.name!)")
    labelName.text = person.name!
}
If you run this, you'll be getting a runtime error of something like this:
fatal error: unexpectedly found nil while unwrapping an Optional value
(lldb) 

Why are we getting this?
Well, the issue is that the getJsonData is downloading data on a different thread, and while this is great, it also means that the return statement of the getJsonData function is getting called before the data finishes downloading.
So, because of this, you're returning an empty Person object, with just nil values. Therefore person.name is nil

In other words, we're returning nothing because we're reaching our return statement before we ever even make our network call.
And that's not good...

Returning data with completion handler

Since we cannot return the data as a good ol' return type, we need a different way to return the data, after we know the download has completed....whenever that is.

For this we use Completion Handlers, also known as Callbacks in other languages.

I won't get into details on this, so if you want to learn more about Completion Handlers there are tons of online resources for that.
In short, they are a parameter sent from whoever wants to be notified of something happening on a different class or function.
In this tutorial, I'm just teaching you how to use them with a specific example to achieve something.

1. The first thing we'll do is modify the getJsonData function to accept a completion handler parameter.
Change the getJsonData function declaration from this:
static func getJsonData(jsonUrlAsString:String) -> Person
to this:
static func getJsonData(jsonUrlAsString:String, completionHandlerPerson:(responsePerson:Person?, errorPerson:NSError?) -> ())

In here, we're passing a new parameter called completionHandlerPerson, which will return 2 elements: a Person object response (named responsePerson), and a NSError object (named errorPerson)
We're also just returning () or Void now, since the return will be handled by the completionHandlerPerson.
Since our completionHandlerPerson has a Person object and a NSError object, we must always use it retuning both elements. This is handy because if we do get data downloaded, the NSError element will be nil, which is easy to check.

2. With the function declaration modified, we now need to return our data with our completionHandlerPerson element.
Our entire getJsonData function will now look like this:
static func getJsonData(jsonUrlAsString:String, completionHandlerPerson:(responsePerson:Person?, errorPerson:NSError?) -> ())
{
    let person = Person()

    let configuration = NSURLSessionConfiguration.defaultSessionConfiguration()
    let headers: [NSObject : AnyObject] = ["Accept":"application/json", "Auth":"token"]
    configuration.HTTPAdditionalHeaders = headers
    let session = NSURLSession(configuration: configuration)
    
    let downloadTask = session.dataTaskWithURL(NSURL(string: jsonUrlAsString)!) { (dataReceived, response, error) in
        if (error == nil)
        {
            print("dataReceived = \(dataReceived)")
            do
            {
                let dataDownloadedAsJson = try NSJSONSerialization.JSONObjectWithData(dataReceived!, options: .AllowFragments)
                print("dataDownloadedAsJson = \(dataDownloadedAsJson)")
                
                let nameRead = dataDownloadedAsJson["name"] as? String
                let countryRead = dataDownloadedAsJson["country"] as? String
                let genderRead = dataDownloadedAsJson["gender"] as? String
                let ageRead = dataDownloadedAsJson["age"] as? Int
                
                print("nameRead = \(nameRead!)")
                print("countryRead = \(countryRead!)")
                print("genderRead = \(genderRead!)")
                print("ageRead = \(ageRead!)")
                
                person.name = nameRead!
                person.age = ageRead!
                person.gender = genderRead!
                person.country = countryRead!
                
                completionHandlerPerson(responsePerson: person, errorPerson: nil)
            }
            catch
            {
                
            }
        }
            else
            {
                print("Error downloading data. Error = \(error)")
                completionHandlerPerson(responsePerson: nil, errorPerson: error)

            }
        }
    
    // actually execute the task
    downloadTask.resume()
}
Notice how we call the completionHandlerPerson twice: once for when the response is valid, and once for when the error happens.
We should also return a third version for when the parser fails, but that'll be your homework.

And with that, the Utilities.getJsonData function is complete.
We need to modify the caller class of ViewController.

In ViewController, you need to change this:
let person = Utilities.getJsonData(jsonUrlAsString)
for this:
Utilities.getJsonData(jsonUrlAsString,
                              completionHandlerPerson: {(responsePerson, errorPerson) -> Void in
                          })
so now we're passing our custom completion handler as a parameter to Utilities, and whenever the download thread finishes, we will be notified to do whatever want to do.

With that, all we're missing is placing the UI elements inside the caller completion handler, and we'll be done.

Here's the final ViewController class:
import UIKit
class ViewController: UIViewController
{

    @IBOutlet weak var labelName: UILabel!
    @IBOutlet weak var labelAge: UILabel!
    @IBOutlet weak var labelGender: UILabel!
    @IBOutlet weak var labelCountry: UILabel!
    
    override func viewDidLoad() {
        super.viewDidLoad()
        
        let jsonUrlAsString = "https://api.myjson.com/bins/2c0aw"
        Utilities.getJsonData(jsonUrlAsString,
                              completionHandlerPerson: {(responsePerson, errorPerson) -> Void in
                                if (errorPerson == nil)
                                {
                                    // don't forget to update the UI in the main thread!
                                    dispatch_async(dispatch_get_main_queue()) { () -> Void in
                                        self.labelName.text = responsePerson!.name!
                                        self.labelAge.text = String(responsePerson!.age!)
                                        self.labelGender.text = responsePerson!.gender!
                                        self.labelCountry.text = responsePerson!.country!
                                    }
                                }
                                
                            })
    }
}

and here's the final Utilities class:
import Foundation
class Utilities : NSObject
{
    static func getJsonData(jsonUrlAsString:String, completionHandlerPerson:(responsePerson:Person?, errorPerson:NSError?) -> ())
    {
        let person = Person()

        let configuration = NSURLSessionConfiguration.defaultSessionConfiguration()
        let headers: [NSObject : AnyObject] = ["Accept":"application/json", "Auth":"token"]
        configuration.HTTPAdditionalHeaders = headers
        let session = NSURLSession(configuration: configuration)
        
        let downloadTask = session.dataTaskWithURL(NSURL(string: jsonUrlAsString)!) { (dataReceived, response, error) in
            if (error == nil)
            {
                print("dataReceived = \(dataReceived)")
                do
                {
                    let dataDownloadedAsJson = try NSJSONSerialization.JSONObjectWithData(dataReceived!, options: .AllowFragments)
                    print("dataDownloadedAsJson = \(dataDownloadedAsJson)")
                    
                    let nameRead = dataDownloadedAsJson["name"] as? String
                    let countryRead = dataDownloadedAsJson["country"] as? String
                    let genderRead = dataDownloadedAsJson["gender"] as? String
                    let ageRead = dataDownloadedAsJson["age"] as? Int
                    
                    print("nameRead = \(nameRead!)")
                    print("countryRead = \(countryRead!)")
                    print("genderRead = \(genderRead!)")
                    print("ageRead = \(ageRead!)")
                    
                    person.name = nameRead!
                    person.age = ageRead!
                    person.gender = genderRead!
                    person.country = countryRead!
                    
                    completionHandlerPerson(responsePerson: person, errorPerson: nil)
                }
                catch
                {
                    
                }
            }
                else
                {
                    print("Error downloading data. Error = \(error)")
                    completionHandlerPerson(responsePerson: nil, errorPerson: error)

                }
            }
        
        // actually execute the task
        downloadTask.resume()
    }
}

And that should be all!
Your app should now be ready to download data in some class, and consume it on another one.

Eduardo

(it's midnight so let me know if I missed something, or something doesn't make sense)

Downloading and parsing JSON data in Swift 2.2

I've primarily moved to the Android world, but I had a side gig that required me to get a jump start on Swift. Last time I touched Swift was with Swift 1.1, and things have changed a bit.

In this tutorial I'm going to show you how to download data from a JSON file stored somewhere on the web, then we're going to parse it, and finally we're going to show it in the UI of the app.

For this tutorial we're going to use NSURLSession and NSURLSessionDataTask to download the data, and we'll use the regular class NSJSONSerialization to parse the downloaded JSON data.
All 3 of these classes are part of the UIKit of iOS, and they are not third-party libraries.

Enough talk, let's get to work.
Note: this was done on June 2016, using Xcode 7.3.1 and Swift 2.2.

Sample JSON

We'll begin with a super simple JSON file that I have stored here, and in case the url is down by the time you read this, here's a copy of it's content:
{

    "name": "Eduardo Flores",
    "age": 32,
    "gender": "male",
    "country": "USA"

}
As you can see, this JSON is super simple. It only contains 1 JSON object (the root object), and 4 key/value pairs, where 3 of these values are Strings and 1 is an Int.

Download the data

For this project I'm going to assume that you know how to create an iOS project in Xcode, so I'll skip that part.
My project is a single view project with nothing on it.

We first need to define the url where our JSON file is, so we'll do that this way:
import UIKit
class ViewController: UIViewController
{

    override func viewDidLoad() {
        super.viewDidLoad()
        
        let jsonUrlAsString = "https://api.myjson.com/bins/2c0aw"
    }
}
After this, we need to setup a configuration we're going to use.
While headers won't be really needed for this simple JSON, I will add them to this tutorial so you know where to place them. Headers go as a dictionary of key/value pairs.
Here's what my configuration, making a GET request, with headers looks like:
import UIKit
class ViewController: UIViewController
{

    override func viewDidLoad() {
        super.viewDidLoad()
        
        let jsonUrlAsString = "https://api.myjson.com/bins/2c0aw"
        
        let configuration = NSURLSessionConfiguration.defaultSessionConfiguration()
        let headers: [NSObject : AnyObject] = ["Accept":"application/json"]
        configuration.HTTPAdditionalHeaders = headers
        let session = NSURLSession(configuration: configuration)
    }
}
If we had additional headers, like an authentication token or something else, that would look like this:
let headers: [NSObject : AnyObject] = ["Accept":"application/json","Auth":"token"]
So, with the configuration set, and the session variable created, we now need to create the NSURLSessionDataTask to actually make the network download.
For this we will use the NSURLSessionDataTask initializer that takes a NSURL, and a completion handler, like this:
session.dataTaskWithURL(NSURL:url>, completionHandler: <(NSData?, NSURLResponse?, NSError?) -> Void)
Since we want to use this, we need to assign this line to a variable.
The variable, with the completion handler using real variables, would then look like this:
let downloadTask = session.dataTaskWithURL(NSURL(string: jsonUrlAsString)!) { (dataReceived, response, error) in
}
And in order to actually make the network call, we need to call the .resume() method of our downloadTask variable.
All together now, this looks like this:
import UIKit
class ViewController: UIViewController
{

    override func viewDidLoad() {
        super.viewDidLoad()
        
        let jsonUrlAsString = "https://api.myjson.com/bins/2c0aw"
        
        let configuration = NSURLSessionConfiguration.defaultSessionConfiguration()
        let headers: [NSObject : AnyObject] = ["Accept":"application/json", "Auth":"token"]
        configuration.HTTPAdditionalHeaders = headers
        let session = NSURLSession(configuration: configuration)

        let downloadTask = session.dataTaskWithURL(NSURL(string: jsonUrlAsString)!) { (dataReceived, response, error) in
        }

        // actually execute the task
        downloadTask.resume()
    }
}
Yay, you've made a GET request. Woohoo!
But nothing visible has happened yet...

Check the downloaded data

In our completion handler of session.dataTaskWithURL we have 3 elements: a NSData object, a NSURLResponse object, and an NSError object.
If something went wrong during the download of the data, our NSError object will have an error, and therefore it won't be nil. If this happens, the NSData and NSURLResponse objects will be nil.
In other words, if the NSError object is nil then the NSData and NSURLResponse objects have data, and if the NSError object is not nil, then the NSData and NSURLResponse objects will be nil.
So, let's check for errors.
let downloadTask = session.dataTaskWithURL(NSURL(string: jsonUrlAsString)!) { (dataReceived, response, error) in
    if (error == nil)
    {
        print("dataReceived = \(dataReceived)")
    }
    else
    {
        print("Error downloading data. Error = \(error)")
    }
}
This is now inside the downloadTask variable, and all I'm doing here is checking to see if the NSError object is nil. If the NSError object is nil, then I print the downloaded data to the console.
Otherwise it means that the NSError is not nil, and something went wrong somewhere.
Also, since the NSError object is nil, the dataReceived variable (coming from the completion handler of session.dataTaskWithURL) should contain data.

If you run the app now, you should have something like this in the console:
dataReceived = Optional(<os_dispatch_data: buf="0x7fc2d14453a0" data="" leaf="" size="66," x7fc2d1604cd0="">)
This is ugly and unusable, but at least it shows you we're getting data back!

Convert the downloaded NSData to JSON object

Assuming our data downloads correctly, and therefore there are no errors at this point, we need to convert the dataReceived into a readable JSONObject. For this, we'll use the NSJSONSerialization class, like this:
NSJSONSerialization.JSONObjectWithData(dataReceived!, options: .AllowFragments)
However, this may throw an exception, as most serializers do, and we want to place the result of the Serialization inside of a variable. (note: there are several options inside the NSJSONReadingOptions class if you want to read into this)

So, adding the exception catcher, in true Java try/catch fashion, we do this now:
let downloadTask = session.dataTaskWithURL(NSURL(string: jsonUrlAsString)!) { (dataReceived, response, error) in
    if (error == nil)
    {
        print("dataReceived = \(dataReceived)")
        do
        {
            let dataDownloadedAsJson = try NSJSONSerialization.JSONObjectWithData(dataReceived!, options: .AllowFragments)
            print("dataDownloadedAsJson = \(dataDownloadedAsJson)")
        }
        catch
        {
            
        }
    }
    else
    {
        print("Error downloading data. Error = \(error)")
    }
}

// actually execute the task
downloadTask.resume()
And now, the output should be something much friendlier, like this:
dataReceived = Optional()
dataDownloadedAsJson = {
    age = 32;
    country = USA;
    gender = male;
    name = "Eduardo Flores";
}
Yay, we have our JSON file, with readable data in the console!

Parsing the JSON data

Now that we have our JSON data available, we need to create Swift variables so we can pass the data around our application. We begin this process by parsing the entire JSON file into small variables for whatever elements we want.

The first thing we're going to do is get the name key of our JSON object. Since this JSON file is super simple, this is a 1 liner, like this:
let nameRead = dataDownloadedAsJson["name"] as? String
print("nameRead = \(nameRead!)")
And when you run it, you should have this output:
name = Eduardo Flores
So, what does this do?
This is actually fairly simple.
1. We have all of our serialized JSON data in a variable called dataDownloadedAsJson
2. Inside our JSON object, we're looking for the key of name
3. We believe, or expect, the value of our key name to be a String object. We could've used the as! keyword (with the exclamation point) instead of as? (with the question mark), but it is preferred to use the question mark version, which allows us to receive nil values. The as! keyword is expecting a String value, while the as? allows String AND nil values. (this is called Optionals, in case you want to read more about it)
4. String would be expected object type
5. We assign the result to this to a new variable called nameRead
6. And when we display it to the console we use the nameRead! with the exclamation point to unwrap the object into a String value

With that, we create variables for all of the key/values from our JSON. Note that you don't need to parse every single element in your JSON and you could just parse the elements you need.

And with that, our entire application looks like this now:
import UIKit
class ViewController: UIViewController
{

    override func viewDidLoad() {
        super.viewDidLoad()
        
        let jsonUrlAsString = "https://api.myjson.com/bins/2c0aw"
        
        let configuration = NSURLSessionConfiguration.defaultSessionConfiguration()
        let headers: [NSObject : AnyObject] = ["Accept":"application/json", "Auth":"token"]
        configuration.HTTPAdditionalHeaders = headers
        let session = NSURLSession(configuration: configuration)

        let downloadTask = session.dataTaskWithURL(NSURL(string: jsonUrlAsString)!) { (dataReceived, response, error) in
            if (error == nil)
            {
                print("dataReceived = \(dataReceived)")
                do
                {
                    let dataDownloadedAsJson = try NSJSONSerialization.JSONObjectWithData(dataReceived!, options: .AllowFragments)
                    print("dataDownloadedAsJson = \(dataDownloadedAsJson)")
                    
                    let nameRead = dataDownloadedAsJson["name"] as? String
                    let countryRead = dataDownloadedAsJson["country"] as? String
                    let genderRead = dataDownloadedAsJson["gender"] as? String
                    let ageRead = dataDownloadedAsJson["age"] as? Int
                    
                    print("nameRead = \(nameRead!)")
                    print("countryRead = \(countryRead!)")
                    print("genderRead = \(genderRead!)")
                    print("ageRead = \(ageRead!)")
                }
                catch
                {
                    
                }
            }
            else
            {
                print("Error downloading data. Error = \(error)")
            }
        }
        
        // actually execute the task
        downloadTask.resume()
    }
}


Display data in UI

With the data downloaded and parsed, we now need to display our data in our UI.
For this I've created 4 UI elements in the storyboard, which I've wired up as IBOutlet in my ViewController file.

Control + Click to create connections

So now we could just try the regular self.something command we use to set elements, right?
Let's do it and see what happens. Here's the code of the downloadTask with the new code to set the UI elements:
let downloadTask = session.dataTaskWithURL(NSURL(string: jsonUrlAsString)!) { (dataReceived, response, error) in
    if (error == nil)
    {
        print("dataReceived = \(dataReceived)")
        do
        {
            let dataDownloadedAsJson = try NSJSONSerialization.JSONObjectWithData(dataReceived!, options: .AllowFragments)
            print("dataDownloadedAsJson = \(dataDownloadedAsJson)")
            
            let nameRead = dataDownloadedAsJson["name"] as? String
            let countryRead = dataDownloadedAsJson["country"] as? String
            let genderRead = dataDownloadedAsJson["gender"] as? String
            let ageRead = dataDownloadedAsJson["age"] as? Int
            
            print("nameRead = \(nameRead!)")
            print("countryRead = \(countryRead!)")
            print("genderRead = \(genderRead!)")
            print("ageRead = \(ageRead!)")
            
            // set UI elements
            self.labelName.text = nameRead!
            self.labelAge.text = String(ageRead!)
            self.labelGender.text = genderRead!
            self.labelCountry.text = countryRead!
        }
        catch
        {
            
        }
    }
    else
    {
        print("Error downloading data. Error = \(error)")
    }
}
And run the app, and you'll get something like this:
Console output, and Simulator running
Your app runs, the console displays the correct output, but your app in the simulator never shows the correct values.
How is this possible, since we clearly have them in the console?

While we never explicitly requested this, the NSURLSessionDataTask class runs on a separate thread, which IS NOT THE UI THREAD.
This means that all of this code will run on the background, and someday, in the distant future, your UI will catch up and update with the code you run on the background thread.
This is a great feature of NSURLSessionDataTask because it allows us to make multiple network calls without locking up the UI for the user, but you need to be aware of it, and need to learn how to handle it properly (not just waiting forever for the UI to update).

So how do we solve this?
We call Apple's friendly (and C language looking) Grand Central Dispatch, and ask it to run our UI code in the UI thead, like this:
// set UI elements
// on the main thread
dispatch_async(dispatch_get_main_queue()) { () -> Void in
    self.labelName.text = nameRead!
    self.labelAge.text = String(ageRead!)
    self.labelGender.text = genderRead!
    self.labelCountry.text = countryRead!
}

So now, the entire code our of our entire application looks like this:
import UIKit
class ViewController: UIViewController
{

    @IBOutlet weak var labelName: UILabel!
    @IBOutlet weak var labelAge: UILabel!
    @IBOutlet weak var labelGender: UILabel!
    @IBOutlet weak var labelCountry: UILabel!
    
    override func viewDidLoad() {
        super.viewDidLoad()
        
        let jsonUrlAsString = "https://api.myjson.com/bins/2c0aw"
        
        let configuration = NSURLSessionConfiguration.defaultSessionConfiguration()
        let headers: [NSObject : AnyObject] = ["Accept":"application/json", "Auth":"token"]
        configuration.HTTPAdditionalHeaders = headers
        let session = NSURLSession(configuration: configuration)

        let downloadTask = session.dataTaskWithURL(NSURL(string: jsonUrlAsString)!) { (dataReceived, response, error) in
            if (error == nil)
            {
                print("dataReceived = \(dataReceived)")
                do
                {
                    let dataDownloadedAsJson = try NSJSONSerialization.JSONObjectWithData(dataReceived!, options: .AllowFragments)
                    print("dataDownloadedAsJson = \(dataDownloadedAsJson)")
                    
                    let nameRead = dataDownloadedAsJson["name"] as? String
                    let countryRead = dataDownloadedAsJson["country"] as? String
                    let genderRead = dataDownloadedAsJson["gender"] as? String
                    let ageRead = dataDownloadedAsJson["age"] as? Int
                    
                    print("nameRead = \(nameRead!)")
                    print("countryRead = \(countryRead!)")
                    print("genderRead = \(genderRead!)")
                    print("ageRead = \(ageRead!)")
                    
                    // set UI elements
                    // on the main thread
                    dispatch_async(dispatch_get_main_queue()) { () -> Void in
                        self.labelName.text = nameRead!
                        self.labelAge.text = String(ageRead!)
                        self.labelGender.text = genderRead!
                        self.labelCountry.text = countryRead!
                    }
                }
                catch
                {
                    
                }
            }
            else
            {
                print("Error downloading data. Error = \(error)")
            }
        }
        
        // actually execute the task
        downloadTask.resume()
    }
}

And there you have it folks!
Now you can run your app, and the UI will be updating as soon as the data gets downloaded.

On my next tutorial I will be showing you how to return the downloaded data to another class, using your own completion handler.
This is more the likely the pattern you'll be using to download data in a larger app.

Eduardo.

Wednesday, March 25, 2015

NSURLSession with Delegates

I have already created 2 tutorials (one for obj-c and one for swift) showing how to use NSURLSession in a very simple case scenario to download an image as NSData, and display it on the screen.

That was fine and dandy, but NSURLSession can do sooo much more than that.
In this post I'll how to use one of the delegates of NSURLSession to download a large image, while displaying how much data you have already downloaded.
Since the image is larger now (5mb from some random website), the image gets automatically placed in a temporary file, which then gets converted to an image.

Final result

As usual, here's the final result of what this will do:

Gif created with "GifGrabber" from the Mac App Store (Free)

So, let's get started.

Declare the delegate

In the header file of your class, declare that you'll implement the "NSURLSessionDownloadDelegate"
@interface ViewController : UIViewController <NSURLSessionDownloadDelegate>

Setup your outlets, and you're all done with the header file.

Setup Configuration, Session and Task

Since we're going to get the data and status back from delegate methods, we're going to do just some basic setup of the Session object. We'll do this when the app starts, so the viewDidLoad method would work for this:
- (void)viewDidLoad
{
    [super viewDidLoad];
    // Do any additional setup after loading the view, typically from a nib.
    
    NSURLSessionConfiguration *configuration = [NSURLSessionConfiguration defaultSessionConfiguration];
    configuration.allowsCellularAccess = NO;
    
    // Other options for configuration, if needed. I dont need them for this test
//    [configuration setHTTPAdditionalHeaders:some dictionary values];
//    configuration.timeoutIntervalForRequest = 30.0;
//    configuration.timeoutIntervalForResource = 60.0;
//    configuration.HTTPMaximumConnectionsPerHost = 1;
    
    NSURLSession *session = [NSURLSession sessionWithConfiguration:configuration
                                                          delegate:self
                                                     delegateQueue:nil];
    NSURLSessionDownloadTask *task = [session downloadTaskWithURL:[NSURL URLWithString:URL_LARGE_IMAGE_1]];
    [task resume];
    
    self.label_downloadURL.text = [NSString stringWithFormat:@"URL = %@", URL_LARGE_IMAGE_1];
}  

In the configuration we can set additional settings or parameters. In this case I'm only using one option, but I have listed a few of the most common ones in case somebody needs them later.
  1. Create and initialize the SessionConfiguration object
  2. Since the image is "large" we're going to limit this to WIFI only
  3. Create the session object, and declare this class (self) as the delegate
  4. Create the task
  5. Start the task ([task resume])
  6. Set the label with the URL we're downloading, just for fun
Implement the required delegate method
Since you're volunteering to be the delegate of NSURLSessionDownloadDelegate, you need to implement (or technically just declare in some cases, but that's a different story) the required methods.
NSURLSessionDownloadDelegate has only 1 required delegate method URLSession:downloadTask:didFinishDownloadingToURL
I implemented this method like this:
- (void)URLSession:(NSURLSession *)session
      downloadTask:(NSURLSessionDownloadTask *)downloadTask
didFinishDownloadingToURL:(NSURL *)location
{
    NSData *imageData = [NSData dataWithContentsOfURL:location];
    
    dispatch_async(dispatch_get_main_queue(),
       ^{
           self.label_savedLocation.text = [NSString stringWithFormat:@"%@", location];   // too much text for 1 label
           self.imageView.image = [UIImage imageWithData:imageData];
       });
}
  1. This method gets called when the image, or whatever you're downloading, has finished downloading, and it will place the downloaded image into a temporary file in your local system. However it does not return the temp file created, but it returns the location of where the temporary file gets saved (in the form of a URL)
  2. I get the NSData from the temporary file location
  3. This method runs on a different/background thread, so if I want to update the UI I have to do it from the main thread. Because of this I call GCD and ask to do something in the main queue
  4. In the main queue, or main/UI thread, I update the status label with the location of the temp file, and I display the image that I downloaded
So that's all for this!

However, NSURLSessionDownloadDelegate has several other methods you can use and play with. I decided to use the URLSession:downloadTask:didWriteDatatotalBytesWritten:totalBytesExpectedToWrite because this method can give me an updated status on how much data I'm supposed to download and how much I have downloaded so far. This makes for a nice "90% downloaded" user update.
So let's use that method.

Implementing the update method

With a super long name, the method  URLSession:downloadTask:didWriteDatatotalBytesWritten:totalBytesExpectedToWrite is where we will be updating the labels with the status of how much data has been downloaded so far.
I implemented this method like this:
- (void)URLSession:(NSURLSession *)session
      downloadTask:(NSURLSessionDownloadTask *)downloadTask
      didWriteData:(int64_t)bytesWritten
 totalBytesWritten:(int64_t)totalBytesWritten
totalBytesExpectedToWrite:(int64_t)totalBytesExpectedToWrite
{
    long percentage = (totalBytesWritten * 100) / totalBytesExpectedToWrite;
    
    dispatch_async(dispatch_get_main_queue(),
       ^{
           self.label_bytesExpected.text = [NSString stringWithFormat:@"Expected = %lld", totalBytesExpectedToWrite];
           self.label_bytesWritten.text = [NSString stringWithFormat:@"Received = %lld (%ld%%)", totalBytesWritten, percentage];
       });
} 
  1. There might be better ways to calculate the percentage, but this will do it for now
  2. Again, this method runs in a different/background thread, so since I want to update the main/UI thread with data from this method, I need to get GCD to run it in the main queue
  3. Update the labels
That is all!

Remember, NSURLSession can do a lot more, like handle basic HTTP authentication in a more elegant way than NSURLConnection, so go and play with it.

As usual, the source code can be found here.

Eduardo.

Tuesday, March 24, 2015

Simple NSURLConnection vs NSURLSession example - using Swift

This is a simple example of how to achieve the same simple GET call with (the "old") NSURLConnection and the new NSURLSession.

This project is now on Swift!
(so 50% less code, and 200% more "Why??"s)

This blog post is almost identical to the previous one I made on objective-c (link) but obviously written on swift. The logic and approach are the same.

The final result
This a simple app with 2 buttons, 1 label and 1 UIImageView.


When you tap the "NSURLConnection" the app downloads a picture of a car using NSURLConnection.
When you tap the "NSURLSession" the app downloads a picture of a car using NSURLSession.
The label also updates to tell you which one you're using.

NSURLConnection

Here's the code to get this GET call using NSURLConnection:
@IBAction func button_useNSURLConnection(sender: AnyObject)
{
    let url = NSURL(string: URL_CAR_1)
    var request = NSMutableURLRequest(URL: url!)
    request.HTTPMethod = "GET"
    
    dispatch_async(dispatch_get_global_queue(DISPATCH_QUEUE_PRIORITY_DEFAULT, 0))
        {
            var responseError: NSError?
            var data = NSURLConnection.sendSynchronousRequest(request,
                returningResponse: AutoreleasingUnsafeMutablePointer<NSURLResponse?>(),
                error: &responseError)
            
            dispatch_async(dispatch_get_main_queue(),
                {
                    self.label_status.text = "Selected NSURLConnection"
                    self.imageView.image = UIImage(data: data!)
                })
        }
}//end button_useNSURLConnection

I decided to make the NSURLConnection a Synchronous request so it can return a value (Asynchronous would just give me a value in a easier way, but that's not fun), but this means it runs in the main thread.
  1. We get a URL from a String (a constant I have defined in my class)
  2. We make a MutableURLRequest with the url of step 1
  3. Set the HTTP method of the request to GET, although this isn't really needed but its good for the tutorial to show how to set the HTTPMethod
  4. Created and used a new GCD queue to make the actual NSURLConnection in a different/background thread
  5. Once the background thread is completed, I'm calling the main GCD queue (main/UI thread) to place the downloaded image into the imageView

NSURLSession

NSURLSession is a bit different. An NSURLSession has be created with a NSURLSessionConfiguration first. Because of this I created a helper method that generates a NSURLSession with the configuration needed, and it returns the NSURLSession it creates:
func getURLSession() -> NSURLSession
{
    var session:NSURLSession
    
    var configuration = NSURLSessionConfiguration.defaultSessionConfiguration()
    session = NSURLSession(configuration: configuration)
   
    return session;
}//end getURLSession

Since I don't want slow down the main thread for this, I placed this code in a different thread.
Then, here's how to make the NSURLSession call:
@IBAction func button_useNSURLSession(sender: AnyObject)
{
    let url = NSURL(string: URL_CAR_2)
    var request = NSMutableURLRequest(URL: url!)
    request.HTTPMethod = "GET"
    
    var task = getURLSession().dataTaskWithRequest(request)
        { (data, response, error) -> Void in
            
            dispatch_async(dispatch_get_main_queue(),
                {
                    self.label_status.text = "Selected NSURLSession"
                    self.imageView.image = UIImage(data: data!)
                })
        }
    
    task.resume()
}//end button_useNSURLSession

Very similar to the NSURLConnection, so I'll start at the NSURLSessionDataTask.
Technically, NSURLSession does not replace NSURLConnection, but NSURLSessionDataTask is what replaces NSURLConnection.

  1. NSURLSessionDataTask is an Asynchronous task, so we're kind of forced to get the data from its completion handler
  2. Call the main/UI thread and set the value of the imageView with the data from the completion handler
  3. Set the task to [task resume] so it can start
That's all!

The sample code can be found here.


Eduardo.

Simple NSURLConnection vs NSURLSession example

This is a simple example of how to achieve the same simple GET call with (the "old") NSURLConnection and the new NSURLSession.
This project is in Objective-C.

Update: I just finished the exact same tutorial using swift (link)

The final result
This a simple app with 2 buttons, 1 label and 1 UIImageView.


When you tap the "NSURLConnection" the app downloads a picture of a car using NSURLConnection.
When you tap the "NSURLSession" the app downloads a picture of a car using NSURLSession.
The label also updates to tell you which one you're using.

NSURLConnection

Here's the code to get this GET call using NSURLConnection:
- (IBAction)button_useNSURLConnection:(id)sender
{
    label_status.text = @"Selected NSURLConnection";
    
    NSURL *url = [NSURL URLWithString:URL_CAR_1];
    NSMutableURLRequest *request = [NSMutableURLRequest requestWithURL:url];
    [request setHTTPMethod:@"GET"];
    
    dispatch_queue_t loadQ = dispatch_queue_create("DownloadQueue", NULL);
    dispatch_sync(loadQ,
                  ^{
                      NSData *data = [NSURLConnection sendSynchronousRequest:request
                                                           returningResponse:nil
                                                                       error:nil];
                      dispatch_async(dispatch_get_main_queue(),
                                     ^{
                                         imageView.image = [UIImage imageWithData:data];
                                     });
                  });
    
    
}

I decided to make the NSURLConnection a Synchronous request so it can return a value (Asynchronous would just give me a value in a easier way, but that's not fun), but this means it runs in the main thread.
  1. We get a URL from a String (a constant I have defined in my class)
  2. We make a MutableURLRequest with the url of step 1
  3. Set the HTTP method of the request to GET
  4. Created a new GCD queue
  5. Used the new GCD queue to make the actual NSURLConnection in a different/background thread
  6. Once the background thread is completed, I'm calling the main GCD queue (main/UI thread) to place the downloaded image into the imageView

NSURLSession

NSURLSession is a bit different. An NSURLSession has be created with a NSURLSessionConfiguration first. Because of this I created a helper method that generates a NSURLSession with the configuration needed, and it returns the NSURLSession it creates:
- (NSURLSession *)getURLSession
{
    static NSURLSession *session = nil;
    static dispatch_once_t onceToken;
    dispatch_once(&onceToken,
                  ^{
                      NSURLSessionConfiguration *configuration = [NSURLSessionConfiguration defaultSessionConfiguration];
                      session = [NSURLSession sessionWithConfiguration:configuration];
                  });
    return session;
}

Since I don't want slow down the main thread for this, I placed this code in a different thread.
Then, here's how to make the NSURLSession call:
- (IBAction)button_useNSURLSession:(id)sender
{
    label_status.text = @"Selected NSURLSession";
    
    NSURL *url = [NSURL URLWithString:URL_CAR_2];
    NSMutableURLRequest *request = [NSMutableURLRequest requestWithURL:url];
    [request setHTTPMethod:@"GET"];
    
    NSURLSessionDataTask *task = [[self getURLSession]
                                  dataTaskWithRequest:request
                                  completionHandler:^(NSData *data,
                                                      NSURLResponse *response,
                                                      NSError *error)
    {
        dispatch_async(dispatch_get_main_queue(),
                       ^{
                           imageView.image = [UIImage imageWithData:data];
                       });
        
    }];
    
    [task resume];
}

Very similar to the NSURLConnection, so I'll start at the NSURLSessionDataTask.
Technically, NSURLSession does not replace NSURLConnection, but NSURLSessionDataTask is what replaces NSURLConnection.

  1. NSURLSessionDataTask is an Asynchronous task, so we're kind of forced to get the data from its completion handler
  2. Call the main/UI thread and set the value of the imageView with the data from the completion handler
  3. Set the task to [task resume] so it can start
That's all!

The sample code can be found here.

Eduardo.

Friday, March 20, 2015

Delegation on iOS

This tutorial is a simple basic idea to show the concept of delegation on iOS, using Objective-C.
Delegation is usually not something a beginner would use, so this tutorial would be targeting intermediate users, which also means it assumes you know your way around Xcode and Objective-c at a reasonable level.

Final result

So here's what the final app looks like:


The app has 2 views, first view and second view. The first view has a label and a button, and the second view has a textField and a button. When you push the button on the second view, the text inside the textField gets placed in the label of the first view.
Pretty simple, but its a great demo of how delegation works.
Let' start by setting up the UI.

Setting up the UI

Create a new single view project in Xcode using storyboards, objective-c and for iPhone.
Delete the default ViewController class (so "ViewController.h" and "ViewController.m").
In the storyboard, make the single ViewController you have be embedded in a navigation controller. Add a second ViewController on your storyboard. Your storyboard should now have 3 elements: 1 NavigationController and 2 ViewControllers. Also, the first ViewController should be linked to the navigationController.
In the first ViewController add 2 labels and 1 button.
In the second ViewController add 1 label, 1 textField and 1 button.
I changed the color in the background of each ViewController to make it more obvious in this demo.
Create a new push segue between the first view controller and the second view controller (not the buttons but the controllers themselves) and name it "segueSecondView".
At this point your UI should look something like this:

Create the classes for the ViewControllers

Create 2 new classes: FirstViewController and SecondViewController, both being a subclass of UIViewController. In your storyboard, make your first view controller be of custom class FirstViewController and your second view controller be of custom class SecondViewController.
Link the IBActions and IBOutlets from the UI to the classes as normal.

Create the protocol

After all the initial setup has been done, its time to start with the actual delegation.
In the SecondViewController.h, we need to do 2 things:
  • Declare a protocol
  • Create a variable of the newly created protocol
Here's what the code looks like. I will explain it below:
//
//  SecondViewController.h
//  Test_Delegate
//
//  Created by Eduardo Flores on 3/20/15.
//  Copyright (c) 2015 Eduardo Flores. All rights reserved.
//

#import <UIKit/UIKit.h>

// declare the delegate
@protocol SecondViewDelegate 

- (void) textFromSecondView:(NSString *)text;

@end // end protocol

// Declare the created delegate into our class
@interface SecondViewController : UIViewController

// Original declaration in our header
@property (nonatomic, weak) id<SecondViewDelegate>  delegate;

@property (weak, nonatomic) IBOutlet UITextField *textField_enterSomeText;
- (IBAction)button_sendTextBack:(id)sender;

@end //end interface

The code above has 2 main sections: the protocol and the interface.

The protocol declares methods that whoever will use this protocol will have to implement. This is pretty much like interfaces in Java. Just declare what the "delegate" has to do, but don't implement it.
The name of the protocol usually, by convention, uses the word "Delegate" and it usually has the name of the class where it is declared.

The interface should look very common to you, with the exception of this line
@property (nonatomic, weak) id<SecondViewDelegate> delegate;
In here we're just declaring a varilable to the protocol created above so we can refer to it from another class.

Passing the data back using the new delegate
What we want to happen is to take the text that's inside the textfield and pass it back to the FirstViewController, and this will happen when we push the button we created in the SecondViewController. After we pass the data back to the FirstViewController, we're going to pop the view to return the UI to the FirstViewController.

So with that idea, code for the button in the SecondViewController.m looks like this:
- (IBAction)button_sendTextBack:(id)sender
{
    // Send the data to whatever class implements the delegate
    [self.delegate textFromSecondView:textField_enterSomeText.text];
    
    // pop the view controller
    [[self navigationController]popViewControllerAnimated:YES];
} 

So that's all we have to do to declare a delegate in out SecondViewController, and to send data back to whoever or whatever class decides to declare itself as a delegate for the SecondViewDelegate.
At this point we're done with SecondViewController.h and SecondViewController.m

Implementing the delegate

Now that we have a class declaring it has a delegate, it is time to have another class declaring itself as delegate of the SecondViewDelegate.

In the FirstViewController.h we need to import the SecondViewController.h and say our class implements the SecondViewDelegate.
Here's what the FirstViewController.h looks like:
//
//  FIrstViewController.h
//  Test_Delegate
//
//  Created by Eduardo Flores on 3/20/15.
//  Copyright (c) 2015 Eduardo Flores. All rights reserved.
//

#import 
#import "SecondViewController.h"

@interface FIrstViewController : UIViewController <SecondViewDelegate>

@property (weak, nonatomic) IBOutlet UILabel *label_receivedText;

- (IBAction)button_startSecondView:(id)sender;

@end

Now we have declared the FirstViewController class is a delegate of SecondViewDelegate, so what's the logic in FirstViewController?
  1. We need to push our view from FirstViewController to SecondViewController 
  2. We need to get a reference to the SecondViewController
  3. We have to get a reference then to the "delegate" variable in the SecondViewController
  4. Since we're a delegate of SecondViewDelegate, we need to implement all of the methods in SecondViewDelegate. This means we have to implement the "- (void)textFromSecondView:(NSString *)text" method
  5. And finally, we need to set the text in the label of the FirstViewController with whatever text is "coming" from the SecondViewDelegate. This won't be visible or applied until we see the FirstViewController the second time, after we return from SecondViewController
Step 1.
We're going to push to the SecondViewController when we push the 1 button in our FirstViewController, so the implementation of the button would look like this:
- (IBAction)button_startSecondView:(id)sender
{
    [self performSegueWithIdentifier:@"segueSecondView" sender:nil];
}

Steps 2 and 3.
Since we're using storyboard we can take advantage of the "prepareForSegue" method. In here we get a reference to the SecondViewController and we declare the FirstViewController as the delegate of the SecondViewDelegate. This is what it looks like:
- (void)prepareForSegue:(UIStoryboardSegue *)segue sender:(id)sender
{
    SecondViewController *svc = (SecondViewController *)[segue destinationViewController];
    svc.delegate = self;
}

Steps 4 and 5.
Since we're now the delegate of SecondViewDelegate we need to implement the "- (void)textFromSecondView:(NSString *)text"method, and in here we're going to set our label from the FirstViewController with the String coming from the delegate.
So it looks like this:
- (void)textFromSecondView:(NSString *)text
{
    label_receivedText.text = text;
}

So there you have it. The SecondViewController now takes some text and sends it to the FirstViewController through the SecondViewDelegate.

The complete source code of this demo can be found on github, right here.

Eduardo

Thursday, March 19, 2015

In-App purchases on iOS

The purpose of this tutorial is to teach how to create an extremely simple and basic iOS application, but enabling it to purchase non-consumable items from iTunes using Apple's in-app purchase system.
I have found a large number of tutorials online about this subject, but most of them use large or existing applications to show this subject, making it harder to understand.
This app is targeted for intermediate level programmers, but it is written in a way that even a beginner programmer can do it.

What you need for this tutorial
  • A mac with Xcode
  • A physical iOS device (iPhone/iPad/iPod Touch)
  • A paid iOS developer account on developer.apple.com. You should also have access to create new apps, products and sandbox users in iTunesConnect (this is enabled by default with paid iOS developer accounts)
  • Basic understanding of Objective-C

The final result
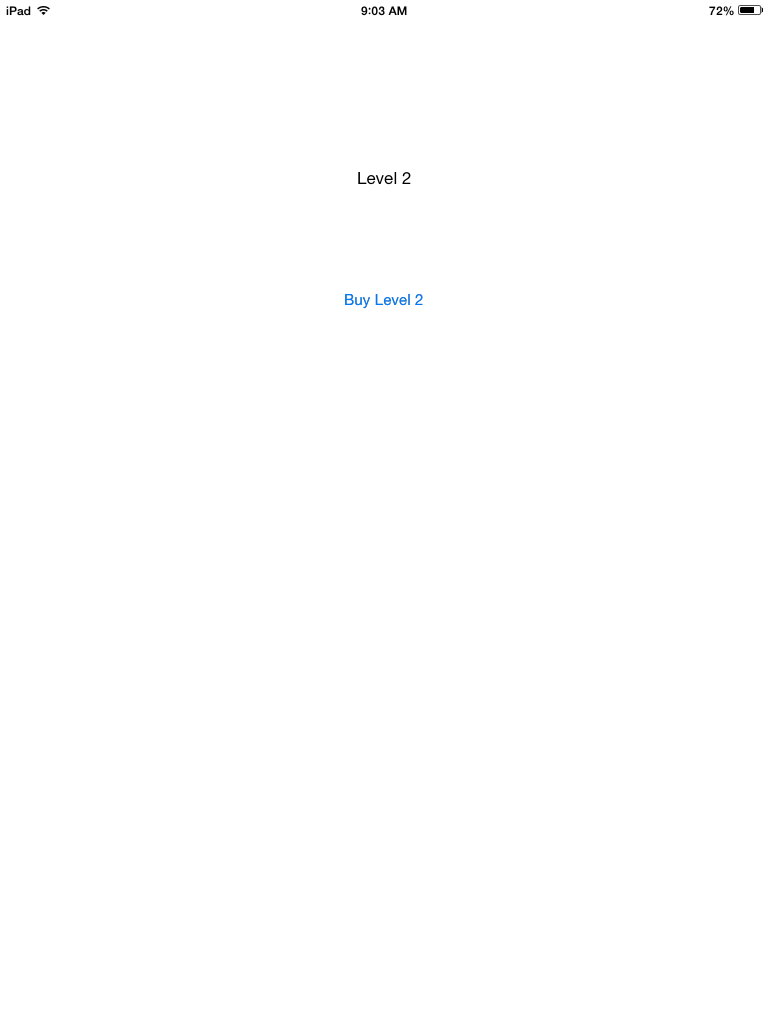
Let's begin by showing you what the app is going to do. Remember, this is a dummy app and the Level 2 doesn't do anything. I will also be using an iPad for this demo, but will work on all iOS devices.

The app has a single view with 2 buttons and 1 label. The single label shows which items you have already purchased:

When you click on the "Buy level 2" item you will be prompt to login (with your sandbox account), and you will be asked to confirm your purchase:


The app will then display a "Thank you for your purchase" type of message, and the second button ("Go to level 2") will be enabled:
That's all. Super simple but it works to illustrate the point of in-app purchases.
So, let's get started.


Setup iTunesConnect

Before start writing a single line of code, or even open Xcode, we will setup iTunesConnect first for our application. This tutorial was created on March 2015, so iTunesConnect might look different for whenever you read this. The concept should remain the same.
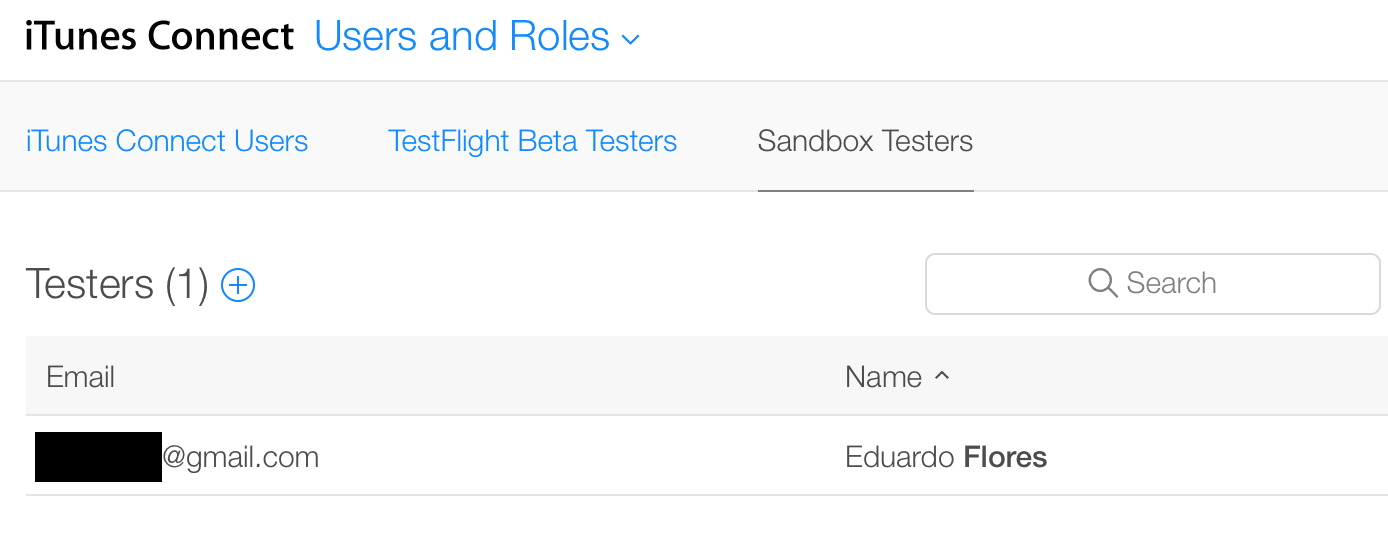
Note: creating the sandbox tester account turned out to be a lot more difficult than what it should be. iTunesConnect doesn't seem to like to use your own email address or any email address that has already been used on iTunesConnect. My best luck was to use a new email address that was not associated or used to log into iCloud, so when the "confirm email address" came, I just logged into the iCloud page with the password created for the Sandbox tester.

After the sandbox tester is created and the account has been verified, you need to log into your physical iOS device with this sandbox login you created. You need to do this in the "Settings -> iTunes & App Store" section of the iOS device.

Start creating the app on Xcode

While we still need to create the app and in-app purchase items in iTunesConnect, begin the creation of the app on Xcode, and running it on a device, helps to get the bundle id setup automatically on iTunesConnect.
  • Start Xcode
  • Create a new single view project
What really matters here in this view is the "bundle identifier." You can modify it later if you want to, but for this demo we will just use something generic that should be available.


Note: iTunesConnect does not like dashes, so avoid them if you can.

Save the app and you will now have a "clean" (only boiler plate code) new project.
We will leave this code "as-is" for now, and we will continue setting up things on iTunesConnect and the iOS developer portal with the information we used on Xcode for our application.

Create the Bundle ID

The first thing we need to do for our application to  be added in iTunesConnect is create the application's bundle id in the developer portal. So:
At this point, you should be looking at something like this:

On the top right corner, click on the "+" button to create a new iOS app ID.
The name is what iTunesConnect will display, and the App ID Prefix is what Apple assigned for your Team ID. What really matters here is what you enter for App ID Suffix.
You could select a wildcard option, but in my experience that makes things get messy once you have multiple apps.

Select "Explicit App ID" and enter the bundle ID, created in Xcode as bundle identifier, exactly the same way it was entered in Xcode.


Scroll down and make sure In-App purchase is selected (it is by default at this time), and click on Continue. Review the information and click on Submit.

Create the App in iTunesConnect

With the bundle ID created, we are done with the developer portal (so you can close it) and we will be going back to iTunesConnect.

In the next window, we will enter the name of the app, a language, the new Bundle ID we just created, the version of the app and a fake SKU. For real applications you might want to get a better SKU.
Note: iTunesConnect will treat this as a real app that you intend to release on the App Store. Because of this iTunesConnect will actually check to see if the bundle id is valid and if the name has been taken. If the name has been already taken, just change the name of the app to something else.

Since we're not going to submit this app to the App Store, we won't worry about screenshots, description, keyword or anything like that.


Setup your In-App products

Still not a single line of code!
In iTunesConnect, under your app go to "In-App purchases" and "Create a new" in-app purchase (note how I had to change the name of my app since DemoInApp was already taken)


Word on the street is that "Non-Consumable" is the most popular type of in-app purchase, since that's what the cool kids use, we will use it as well.

Once we select the Non-Consumable type, we need to enter some information for our in-app product.
  • Reference name: Something internal that only you will see. Could be anything
  • Product ID: this is how we will refer to our in-app product from our code. Make it something relevant to your app, like adding the bundle prefix and the reference name
  • Price Tier: Could be anything, but selected Free since this is just a demo

  • Language: You are required to enter at least 1 language.
  • Display name and description: These will be a localized name and description of your in-app product and it will be visible to the end-user so make something appropriate.
  • Hosting with Apple: No. We're not uploading content to apple at this time as the purpose of this simple demo is to enable things that already exist within the app but are hidden or disabled.

Save your in-app purchase product, and you should have something like this:

We are now finally and officially done with iTunesConnect, although we will need the "Product ID" to be called from our code.
Let's move to Xcode now!

Create the UI for the application

The UI will be super simple. 2 buttons and 1 label. Organize them anywhere you want.
  • Button_buyLevel2: This button is what triggers the purchase of the in-app purchase. This button is visible and enabled
  • Button_goToLevel2: This button uses the in-app purchase. In practice this button will open a new window or access the new material the user just purchased. This button is hidden and disabled until the level 2 gets purchased.
  • Label_status: This is just a status line to tell you if the level 2 has been purchased

Notice how the Button_goToLevel2 is declared as both an IBAction and an IBOutlet. The reason for this is because we want to reference the Button_goToLevel2 and be able to hide it and disable it at runtime.

With the UI done, it's time to setup the library we will use, and the code we will write.

Add StoreKit to the application

The application will use an Apple provided library called StoreKit to handle all in-app related transactions. You can add the StoreKit as part of the Capabilities of the app, or manually.
I will add it manually.
  • Select your application project in the Navigator
  • Go to "Build Phases"
  • Expand "Link Binary with Libraries"
  • Click the "+" to add a library
  • Select "StoreKit.framework" and add it


Congratulations. You just added StoreKit to your application.
Now it's time to finally write some code!

Write the code for in-app purchases

When we created the project in Xcode, Xcode generated several files for us. We're only going to work with 2 files. ViewController.h and ViewController.m.

In the header file (ViewController.h) we need to:
  • Import the StoreKit framework we just linked
  • Declare that our code will implement the SKPaymentTransactionObserver and the SKProductRequestDelegate delegates
  • Create a variable for the SKPaymentQueue
  • Create a variable for the SKProduct we will purchase
After this, your ViewController.h file should look like this:
//
//  ViewController.h
//  DemoInApp
//
//  Created by Eduardo Flores on 3/19/15.
//  Copyright (c) 2015 Eduardo Flores. All rights reserved.
//

#import 
#import 

@interface ViewController : UIViewController <SKPaymentTransactionObserver, SKProductsRequestDelegate>
{
    SKPaymentQueue *defaultQueue;
    SKProduct *product;
}

@property (weak, nonatomic) IBOutlet UILabel *Label_status;
@property (weak, nonatomic) IBOutlet UIButton *Button_goToLevel2;

- (IBAction)Button_buyLevel2:(id)sender;
- (IBAction)Button_goToLevel2:(id)sender;

@end

We're done with our header file. We will now work on our implementation file (ViewController.m)
The first thing I always like to do is synthesize the IBOutlets I have. This is no longer necessary, but I still prefer this method over the self.variable option.

In viewDidLoad, we will:
  • Initialize the SKPaymentQueue variable
  • Make the notify the defaultQueue that we will be the observer for transactions
  • Disable and hide the "Go to level 2" button since it hasn't been purchased yet 
  • Call our method "getProductInfo" which will be created in a minute.
Our viewDidLoad looks like this now:
- (void)viewDidLoad
{
    [super viewDidLoad];
    // Do any additional setup after loading the view, typically from a nib.
    
    defaultQueue = [SKPaymentQueue defaultQueue];
    [defaultQueue addTransactionObserver:self];
    
    Button_goToLevel2.enabled = NO;
    Button_goToLevel2.hidden = YES;
    
    [self getProductInfo];
} 


We will then create our "getProductInfo" method.
This method first checks if the application's SKPaymentQueue is able to make payments. If it is, it creates a product ID with an NSSet of 1 single object using the Product ID we created in iTunesConnect for the in-app purchase product.
After that it creates a request, makes the delegate of the request look at this class for callbacks, and starts the request.
Our getInfoProduct method would then look like this:
- (void) getProductInfo
{
    if ([SKPaymentQueue canMakePayments])
    {
        // This object comes from iTunesConnect
        // This is the in-app purchase item created
        NSSet *productID = [NSSet setWithObject:@"com.eduardoflores.level2"];   // From iTunesConnect in-app product
        SKProductsRequest *request = [[SKProductsRequest alloc]initWithProductIdentifiers:productID];
        request.delegate = self;
        [request start];
    }
}
Since we're the delegate for the StoreKit transactionObserver and productRequest, we need to implement 2 methods to get the information from the StoreKit.
These methods are "paymentQueue:updatedTransactions" and "productsRequest:didReceiveResponse"

Here's what the "paymentQueue:updatedTransactions" would look like:
- (void)paymentQueue:(SKPaymentQueue *)queue updatedTransactions:(NSArray *)transactions
{
    for (SKPaymentTransaction *transaction in transactions)
    {
        switch (transaction.transactionState)
        {
            case SKPaymentTransactionStatePurchased:
                [self openLevel2];
                [defaultQueue finishTransaction:transaction];
                break;
            case SKPaymentTransactionStateFailed:
                [defaultQueue finishTransaction:transaction];
                break;
            case SKPaymentTransactionStateRestored:
                [defaultQueue restoreCompletedTransactions];
                break;
            default:
                break;
        }
    }
}

In here the paymentQueue:updatedTransactions we're looping for a the transactions we're getting from the paymentQueue. For each transaction we're doing a switch based on the state of the transaction. If the SKPaymentTransactionState is "Purchased" we will then call a new method (which we will create in a minute) to open or enable the level 2 that has been purchased, and finish the transaction. If the transaction failed, finish the transaction. And finally, if the transaction was restored, let the queue restore the completed transactions.

Now here's the "productsRequest:didReceiveResponse":
- (void)productsRequest:(SKProductsRequest *)request didReceiveResponse:(SKProductsResponse *)response
{
    NSArray *products = response.products;
    if ([products count] != 0)
    {
        product = [products objectAtIndex:0];
        NSLog(@"product Title = %@", product.localizedTitle);
        NSLog(@"product Description = %@", product.localizedDescription);
        
        Label_status.text = [NSString stringWithFormat:@"%@\n%@", product.localizedTitle, product.localizedDescription];
    }
    
}

This one is super simple, and gets called at startup and gets all of the products that exist in our in-app inventory in iTunesConnect.
The delegate receives an array of responses, which we then call it products for simplicity.
For each product, we get the localized name and localized description which we added manually in iTunesConnect (remember, something appropriate in English only for now). Then we set these elements in the label to display it to the user, and in this case I'm also outputting them to the log just for fun.

There's one more method mentioned in this tutorial, which is to open the level 2. In my case, all this method does is enable the button to use the level 2 and make it visible, like this:
- (void) openLevel2
{
    NSLog(@"in openLevel2");
    
    Button_goToLevel2.enabled = YES;
    Button_goToLevel2.hidden = NO;
}

Finally, pushing the "buy level 2" button triggers the purchase:
- (IBAction)Button_buyLevel2:(id)sender
{
    NSLog(@"in button_buyLevel2" );
    
    if (product)
    {
        SKPayment *payment = [SKPayment paymentWithProduct:product];
        [defaultQueue addPayment:payment];
    }
    else
        NSLog(@"Can't handle payment. Product is null");
    
}


I hope this tutorial helps!


Lastly, the source code for this project can be found here: Source Code