I have found a large number of tutorials online about this subject, but most of them use large or existing applications to show this subject, making it harder to understand.
This app is targeted for intermediate level programmers, but it is written in a way that even a beginner programmer can do it.
What you need for this tutorial
- A mac with Xcode
- A physical iOS device (iPhone/iPad/iPod Touch)
- A paid iOS developer account on developer.apple.com. You should also have access to create new apps, products and sandbox users in iTunesConnect (this is enabled by default with paid iOS developer accounts)
- Basic understanding of Objective-C
The final result
Let's begin by showing you what the app is going to do. Remember, this is a dummy app and the Level 2 doesn't do anything. I will also be using an iPad for this demo, but will work on all iOS devices.
The app has a single view with 2 buttons and 1 label. The single label shows which items you have already purchased:
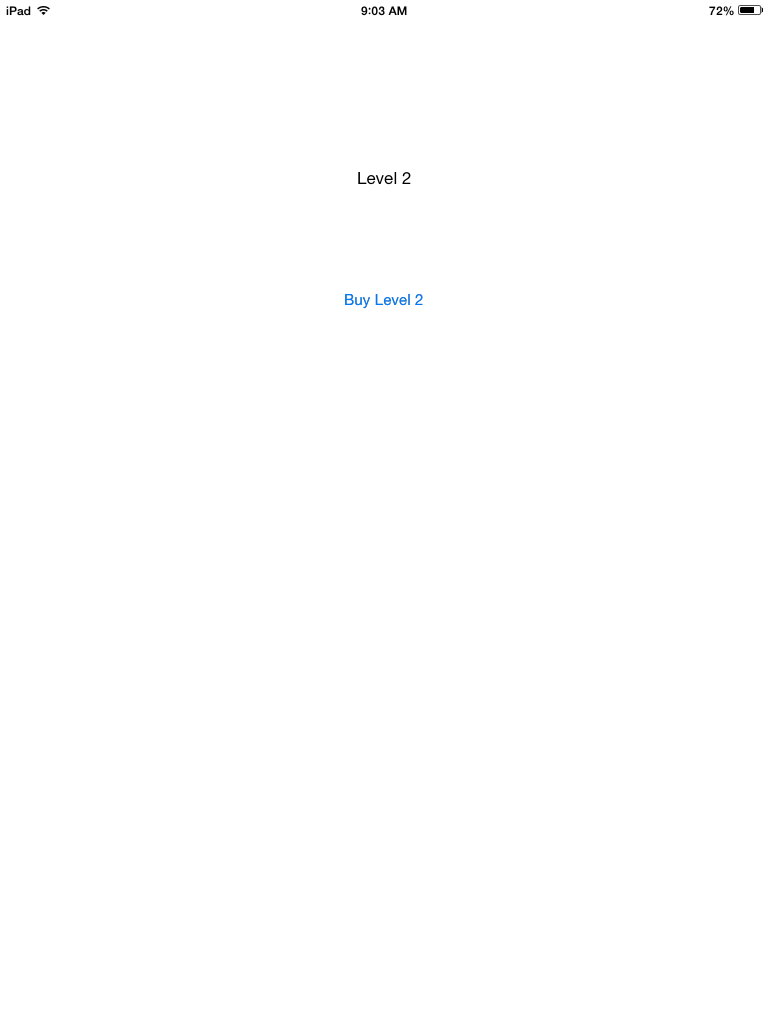
When you click on the "Buy level 2" item you will be prompt to login (with your sandbox account), and you will be asked to confirm your purchase:

The app will then display a "Thank you for your purchase" type of message, and the second button ("Go to level 2") will be enabled:

So, let's get started.
Setup iTunesConnect
Before start writing a single line of code, or even open Xcode, we will setup iTunesConnect first for our application. This tutorial was created on March 2015, so iTunesConnect might look different for whenever you read this. The concept should remain the same.- Go to https://itunesconnect.apple.com and login
- Go to "Users and Roles"
- Then go to "Sandbox Testers" and create a new account
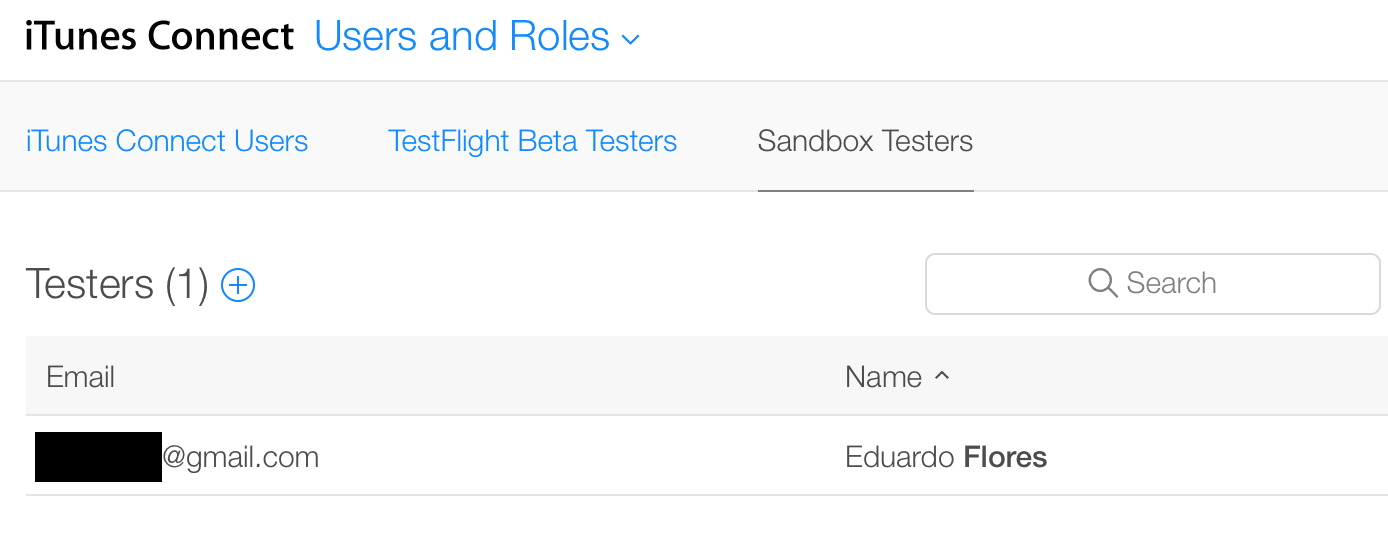 Note: creating the sandbox tester account turned out to be a lot more difficult than what it should be. iTunesConnect doesn't seem to like to use your own email address or any email address that has already been used on iTunesConnect. My best luck was to use a new email address that was not associated or used to log into iCloud, so when the "confirm email address" came, I just logged into the iCloud page with the password created for the Sandbox tester.
After the sandbox tester is created and the account has been verified, you need to log into your physical iOS device with this sandbox login you created. You need to do this in the "Settings -> iTunes & App Store" section of the iOS device.
Start creating the app on Xcode
While we still need to create the app and in-app purchase items in iTunesConnect, begin the creation of the app on Xcode, and running it on a device, helps to get the bundle id setup automatically on iTunesConnect.- Start Xcode
- Create a new single view project

Note: iTunesConnect does not like dashes, so avoid them if you can.
Save the app and you will now have a "clean" (only boiler plate code) new project.
We will leave this code "as-is" for now, and we will continue setting up things on iTunesConnect and the iOS developer portal with the information we used on Xcode for our application.
Create the Bundle ID
The first thing we need to do for our application to be added in iTunesConnect is create the application's bundle id in the developer portal. So:- Go to https://developer.apple.com
- To the "Certificates, Identifiers & Profiles" section on the right
- Under iOS, select "Identifiers"

On the top right corner, click on the "+" button to create a new iOS app ID.
The name is what iTunesConnect will display, and the App ID Prefix is what Apple assigned for your Team ID. What really matters here is what you enter for App ID Suffix.
You could select a wildcard option, but in my experience that makes things get messy once you have multiple apps.
Select "Explicit App ID" and enter the bundle ID, created in Xcode as bundle identifier, exactly the same way it was entered in Xcode.

Scroll down and make sure In-App purchase is selected (it is by default at this time), and click on Continue. Review the information and click on Submit.
Create the App in iTunesConnect
With the bundle ID created, we are done with the developer portal (so you can close it) and we will be going back to iTunesConnect.- Go back to https://itunesconnect.apple.com and login
- Go to "My Apps"
- Click on the "+" sign on the top left, and create a new iOS app

In the next window, we will enter the name of the app, a language, the new Bundle ID we just created, the version of the app and a fake SKU. For real applications you might want to get a better SKU.

Since we're not going to submit this app to the App Store, we won't worry about screenshots, description, keyword or anything like that.
Setup your In-App products
Still not a single line of code!In iTunesConnect, under your app go to "In-App purchases" and "Create a new" in-app purchase (note how I had to change the name of my app since DemoInApp was already taken)


Word on the street is that "Non-Consumable" is the most popular type of in-app purchase, since that's what the cool kids use, we will use it as well.

Once we select the Non-Consumable type, we need to enter some information for our in-app product.
- Reference name: Something internal that only you will see. Could be anything
- Product ID: this is how we will refer to our in-app product from our code. Make it something relevant to your app, like adding the bundle prefix and the reference name
- Price Tier: Could be anything, but selected Free since this is just a demo

- Language: You are required to enter at least 1 language.
- Display name and description: These will be a localized name and description of your in-app product and it will be visible to the end-user so make something appropriate.
- Hosting with Apple: No. We're not uploading content to apple at this time as the purpose of this simple demo is to enable things that already exist within the app but are hidden or disabled.
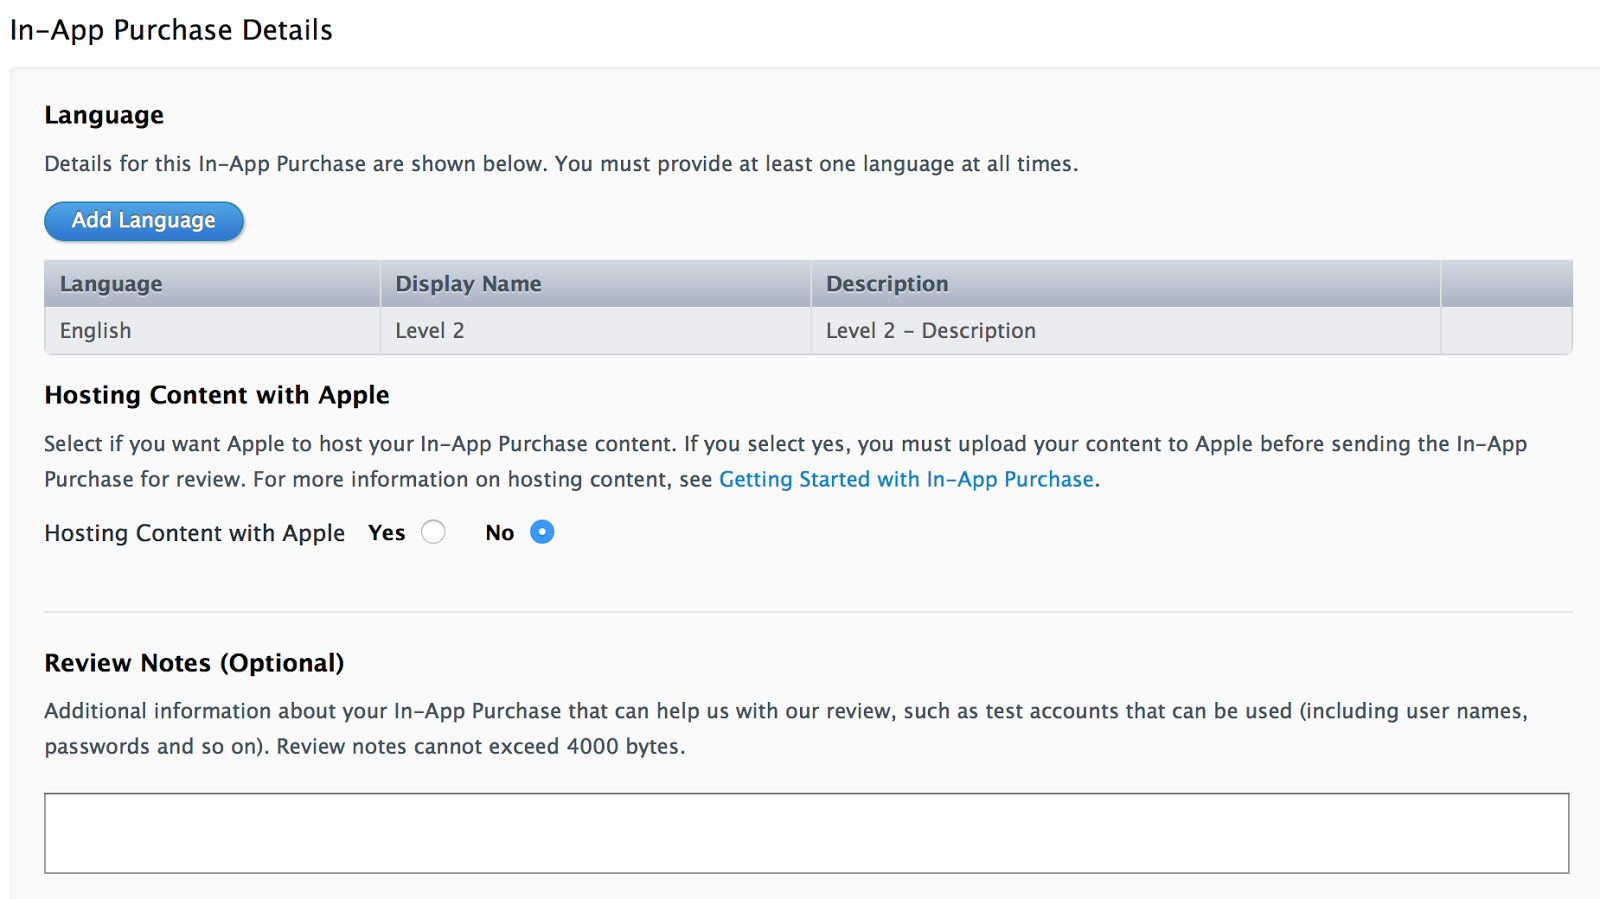
Save your in-app purchase product, and you should have something like this:

We are now finally and officially done with iTunesConnect, although we will need the "Product ID" to be called from our code.
Let's move to Xcode now!
Create the UI for the application
The UI will be super simple. 2 buttons and 1 label. Organize them anywhere you want.- Button_buyLevel2: This button is what triggers the purchase of the in-app purchase. This button is visible and enabled
- Button_goToLevel2: This button uses the in-app purchase. In practice this button will open a new window or access the new material the user just purchased. This button is hidden and disabled until the level 2 gets purchased.
- Label_status: This is just a status line to tell you if the level 2 has been purchased

With the UI done, it's time to setup the library we will use, and the code we will write.
Add StoreKit to the application
The application will use an Apple provided library called StoreKit to handle all in-app related transactions. You can add the StoreKit as part of the Capabilities of the app, or manually.I will add it manually.
- Select your application project in the Navigator
- Go to "Build Phases"
- Expand "Link Binary with Libraries"
- Click the "+" to add a library
- Select "StoreKit.framework" and add it

Congratulations. You just added StoreKit to your application.
Now it's time to finally write some code!
Write the code for in-app purchases
When we created the project in Xcode, Xcode generated several files for us. We're only going to work with 2 files. ViewController.h and ViewController.m.In the header file (ViewController.h) we need to:
- Import the StoreKit framework we just linked
- Declare that our code will implement the SKPaymentTransactionObserver and the SKProductRequestDelegate delegates
- Create a variable for the SKPaymentQueue
- Create a variable for the SKProduct we will purchase
// // ViewController.h // DemoInApp // // Created by Eduardo Flores on 3/19/15. // Copyright (c) 2015 Eduardo Flores. All rights reserved. // #import#import @interface ViewController : UIViewController <SKPaymentTransactionObserver, SKProductsRequestDelegate> { SKPaymentQueue *defaultQueue; SKProduct *product; } @property (weak, nonatomic) IBOutlet UILabel *Label_status; @property (weak, nonatomic) IBOutlet UIButton *Button_goToLevel2; - (IBAction)Button_buyLevel2:(id)sender; - (IBAction)Button_goToLevel2:(id)sender; @end
We're done with our header file. We will now work on our implementation file (ViewController.m)
The first thing I always like to do is synthesize the IBOutlets I have. This is no longer necessary, but I still prefer this method over the self.variable option.
In viewDidLoad, we will:
- Initialize the SKPaymentQueue variable
- Make the notify the defaultQueue that we will be the observer for transactions
- Disable and hide the "Go to level 2" button since it hasn't been purchased yet
- Call our method "getProductInfo" which will be created in a minute.
- (void)viewDidLoad
{
    [super viewDidLoad];
    // Do any additional setup after loading the view, typically from a nib.

    defaultQueue = [SKPaymentQueue defaultQueue];
    [defaultQueue addTransactionObserver:self];

    Button_goToLevel2.enabled = NO;
    Button_goToLevel2.hidden = YES;

    [self getProductInfo];
}
We will then create our "getProductInfo" method.
This method first checks if the application's SKPaymentQueue is able to make payments. If it is, it creates a product ID with an NSSet of 1 single object using the Product ID we created in iTunesConnect for the in-app purchase product.
After that it creates a request, makes the delegate of the request look at this class for callbacks, and starts the request.
Our getInfoProduct method would then look like this:
- (void) getProductInfo
{
    if ([SKPaymentQueue canMakePayments])
    {
        // This object comes from iTunesConnect
        // This is the in-app purchase item created
        NSSet *productID = [NSSet setWithObject:@"com.eduardoflores.level2"];   // From iTunesConnect in-app product
        SKProductsRequest *request = [[SKProductsRequest alloc]initWithProductIdentifiers:productID];
        request.delegate = self;
        [request start];
    }
}
Since we're the delegate for the StoreKit transactionObserver and productRequest, we need to implement 2 methods to get the information from the StoreKit.These methods are "paymentQueue:updatedTransactions" and "productsRequest:didReceiveResponse"
Here's what the "paymentQueue:updatedTransactions" would look like:
- (void)paymentQueue:(SKPaymentQueue *)queue updatedTransactions:(NSArray *)transactions
{
    for (SKPaymentTransaction *transaction in transactions)
    {
        switch (transaction.transactionState)
        {
            case SKPaymentTransactionStatePurchased:
                [self openLevel2];
                [defaultQueue finishTransaction:transaction];
                break;
            case SKPaymentTransactionStateFailed:
                [defaultQueue finishTransaction:transaction];
                break;
            case SKPaymentTransactionStateRestored:
                [defaultQueue restoreCompletedTransactions];
                break;
            default:
                break;
        }
    }
}
In here the paymentQueue:updatedTransactions we're looping for a the transactions we're getting from the paymentQueue. For each transaction we're doing a switch based on the state of the transaction. If the SKPaymentTransactionState is "Purchased" we will then call a new method (which we will create in a minute) to open or enable the level 2 that has been purchased, and finish the transaction. If the transaction failed, finish the transaction. And finally, if the transaction was restored, let the queue restore the completed transactions.
Now here's the "productsRequest:didReceiveResponse":
- (void)productsRequest:(SKProductsRequest *)request didReceiveResponse:(SKProductsResponse *)response
{
    NSArray *products = response.products;
    if ([products count] != 0)
    {
        product = [products objectAtIndex:0];
        NSLog(@"product Title = %@", product.localizedTitle);
        NSLog(@"product Description = %@", product.localizedDescription);

        Label_status.text = [NSString stringWithFormat:@"%@\n%@", product.localizedTitle, product.localizedDescription];
    }

}
This one is super simple, and gets called at startup and gets all of the products that exist in our in-app inventory in iTunesConnect.
The delegate receives an array of responses, which we then call it products for simplicity.
For each product, we get the localized name and localized description which we added manually in iTunesConnect (remember, something appropriate in English only for now). Then we set these elements in the label to display it to the user, and in this case I'm also outputting them to the log just for fun.
There's one more method mentioned in this tutorial, which is to open the level 2. In my case, all this method does is enable the button to use the level 2 and make it visible, like this:
- (void) openLevel2
{
    NSLog(@"in openLevel2");

    Button_goToLevel2.enabled = YES;
    Button_goToLevel2.hidden = NO;
}
Finally, pushing the "buy level 2" button triggers the purchase:
- (IBAction)Button_buyLevel2:(id)sender
{
    NSLog(@"in button_buyLevel2" );

    if (product)
    {
        SKPayment *payment = [SKPayment paymentWithProduct:product];
        [defaultQueue addPayment:payment];
    }
    else
        NSLog(@"Can't handle payment. Product is null");

}
I hope this tutorial helps!
Lastly, the source code for this project can be found here: Source Code
I have followed by this tutorial. But when I run the app on real-device. The Log alway show "Can't handle payment. Product is null". Can you help me to fix this. Thanks!
ReplyDeleteHi. I would need more information to determine where you issue is. Did you create the project and products in itunesConnect? Are you using the same id for the products in your ios app as what you have in itunesconnect?
Deletehi .. is this same for Auto renewable in app purchases???
ReplyDeleteNice post,keep sharing ..
ReplyDeleteios online course
SMM PANEL
ReplyDeletesmm panel
iş ilanları
İnstagram takipçi satın al
hirdavatciburada.com
beyazesyateknikservisi.com.tr
servis
TİKTOK PARA HİLESİ İNDİR
minecraft premium
ReplyDeletenft nasıl alınır
en son çıkan perde modelleri
uc satın al
lisans satın al
özel ambulans
en son çıkan perde modelleri
yurtdışı kargo